Integrate the SPREEAI SDK on Shopify
This guide is a walkthrough for integrating SPREEAI's Javascript SDK into your Shopify store by first creating a SPREEAI specific collection and then steps to integrate the SDK.
Creating a SPREEAI collection
One of the first steps we suggest is creating a collection in Shopify containing the products that are enabled for try-on. This collection acts as a great way to manage the products that are available for try-on and the code snippets below will allow you to render the button only on products within the collection. That way if you remove an item from the collection the try-on button will no longer appear for it. Conversely, adding products to the collection will enable those products for try-on. This gives you more control over your products and their try-on experience.
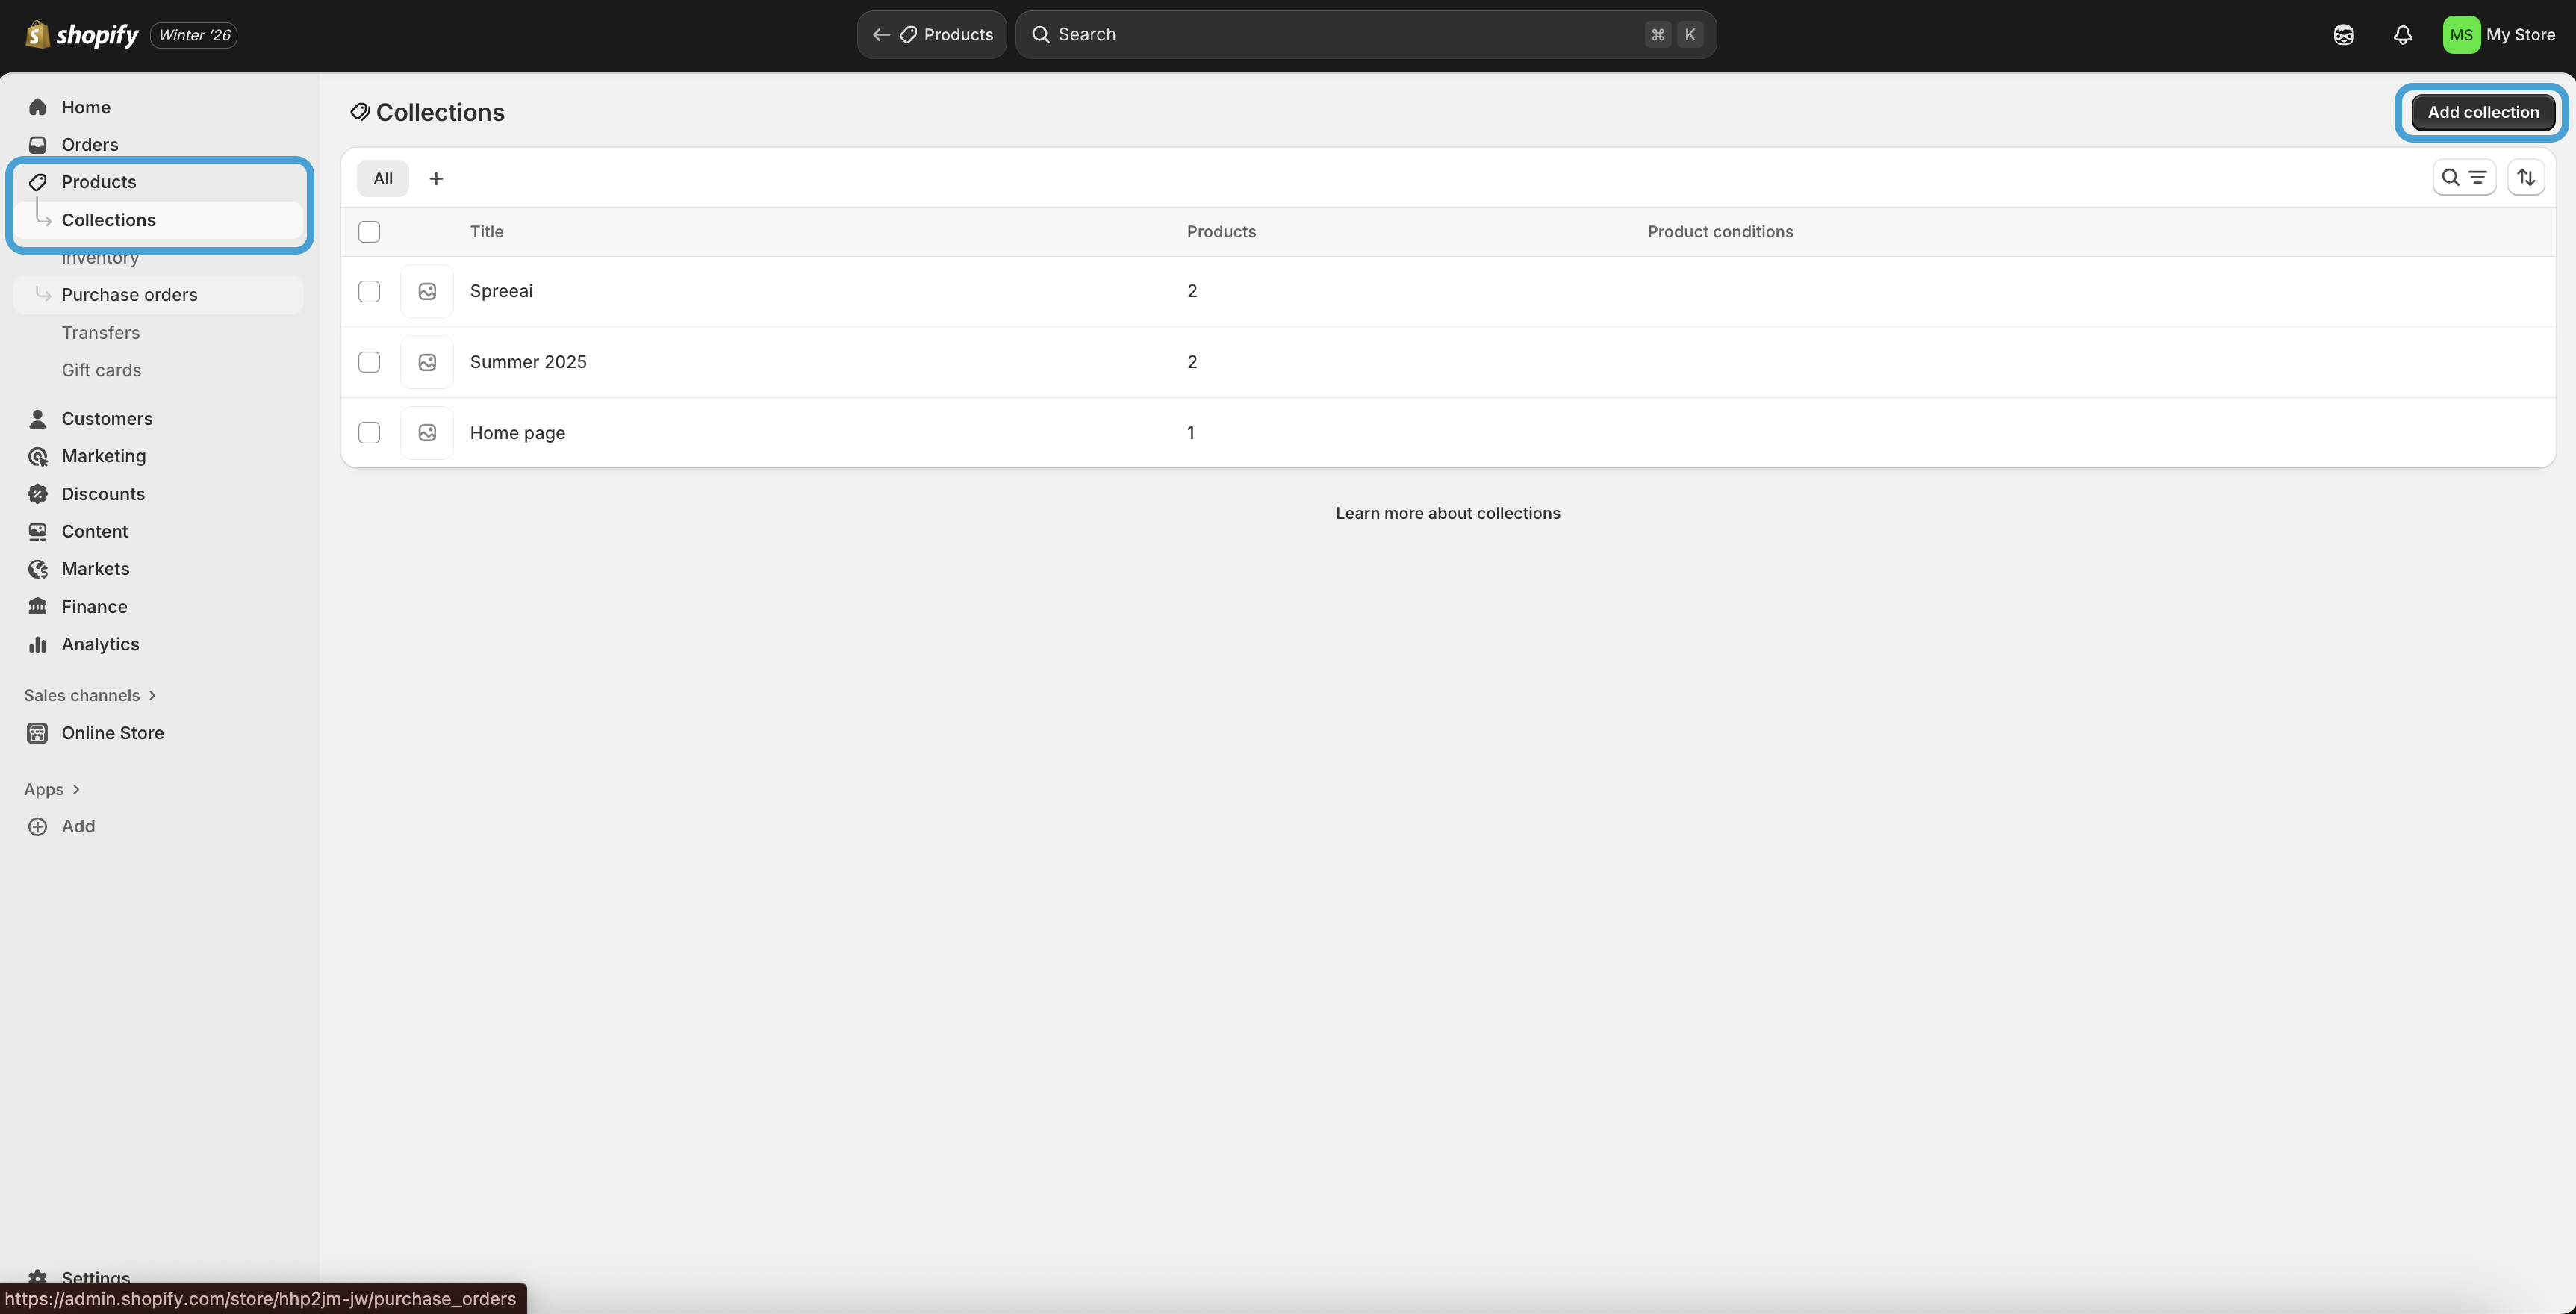
You can create a new collection by visiting your Store Dashboard > Products > Collections > Click on "Add collection"
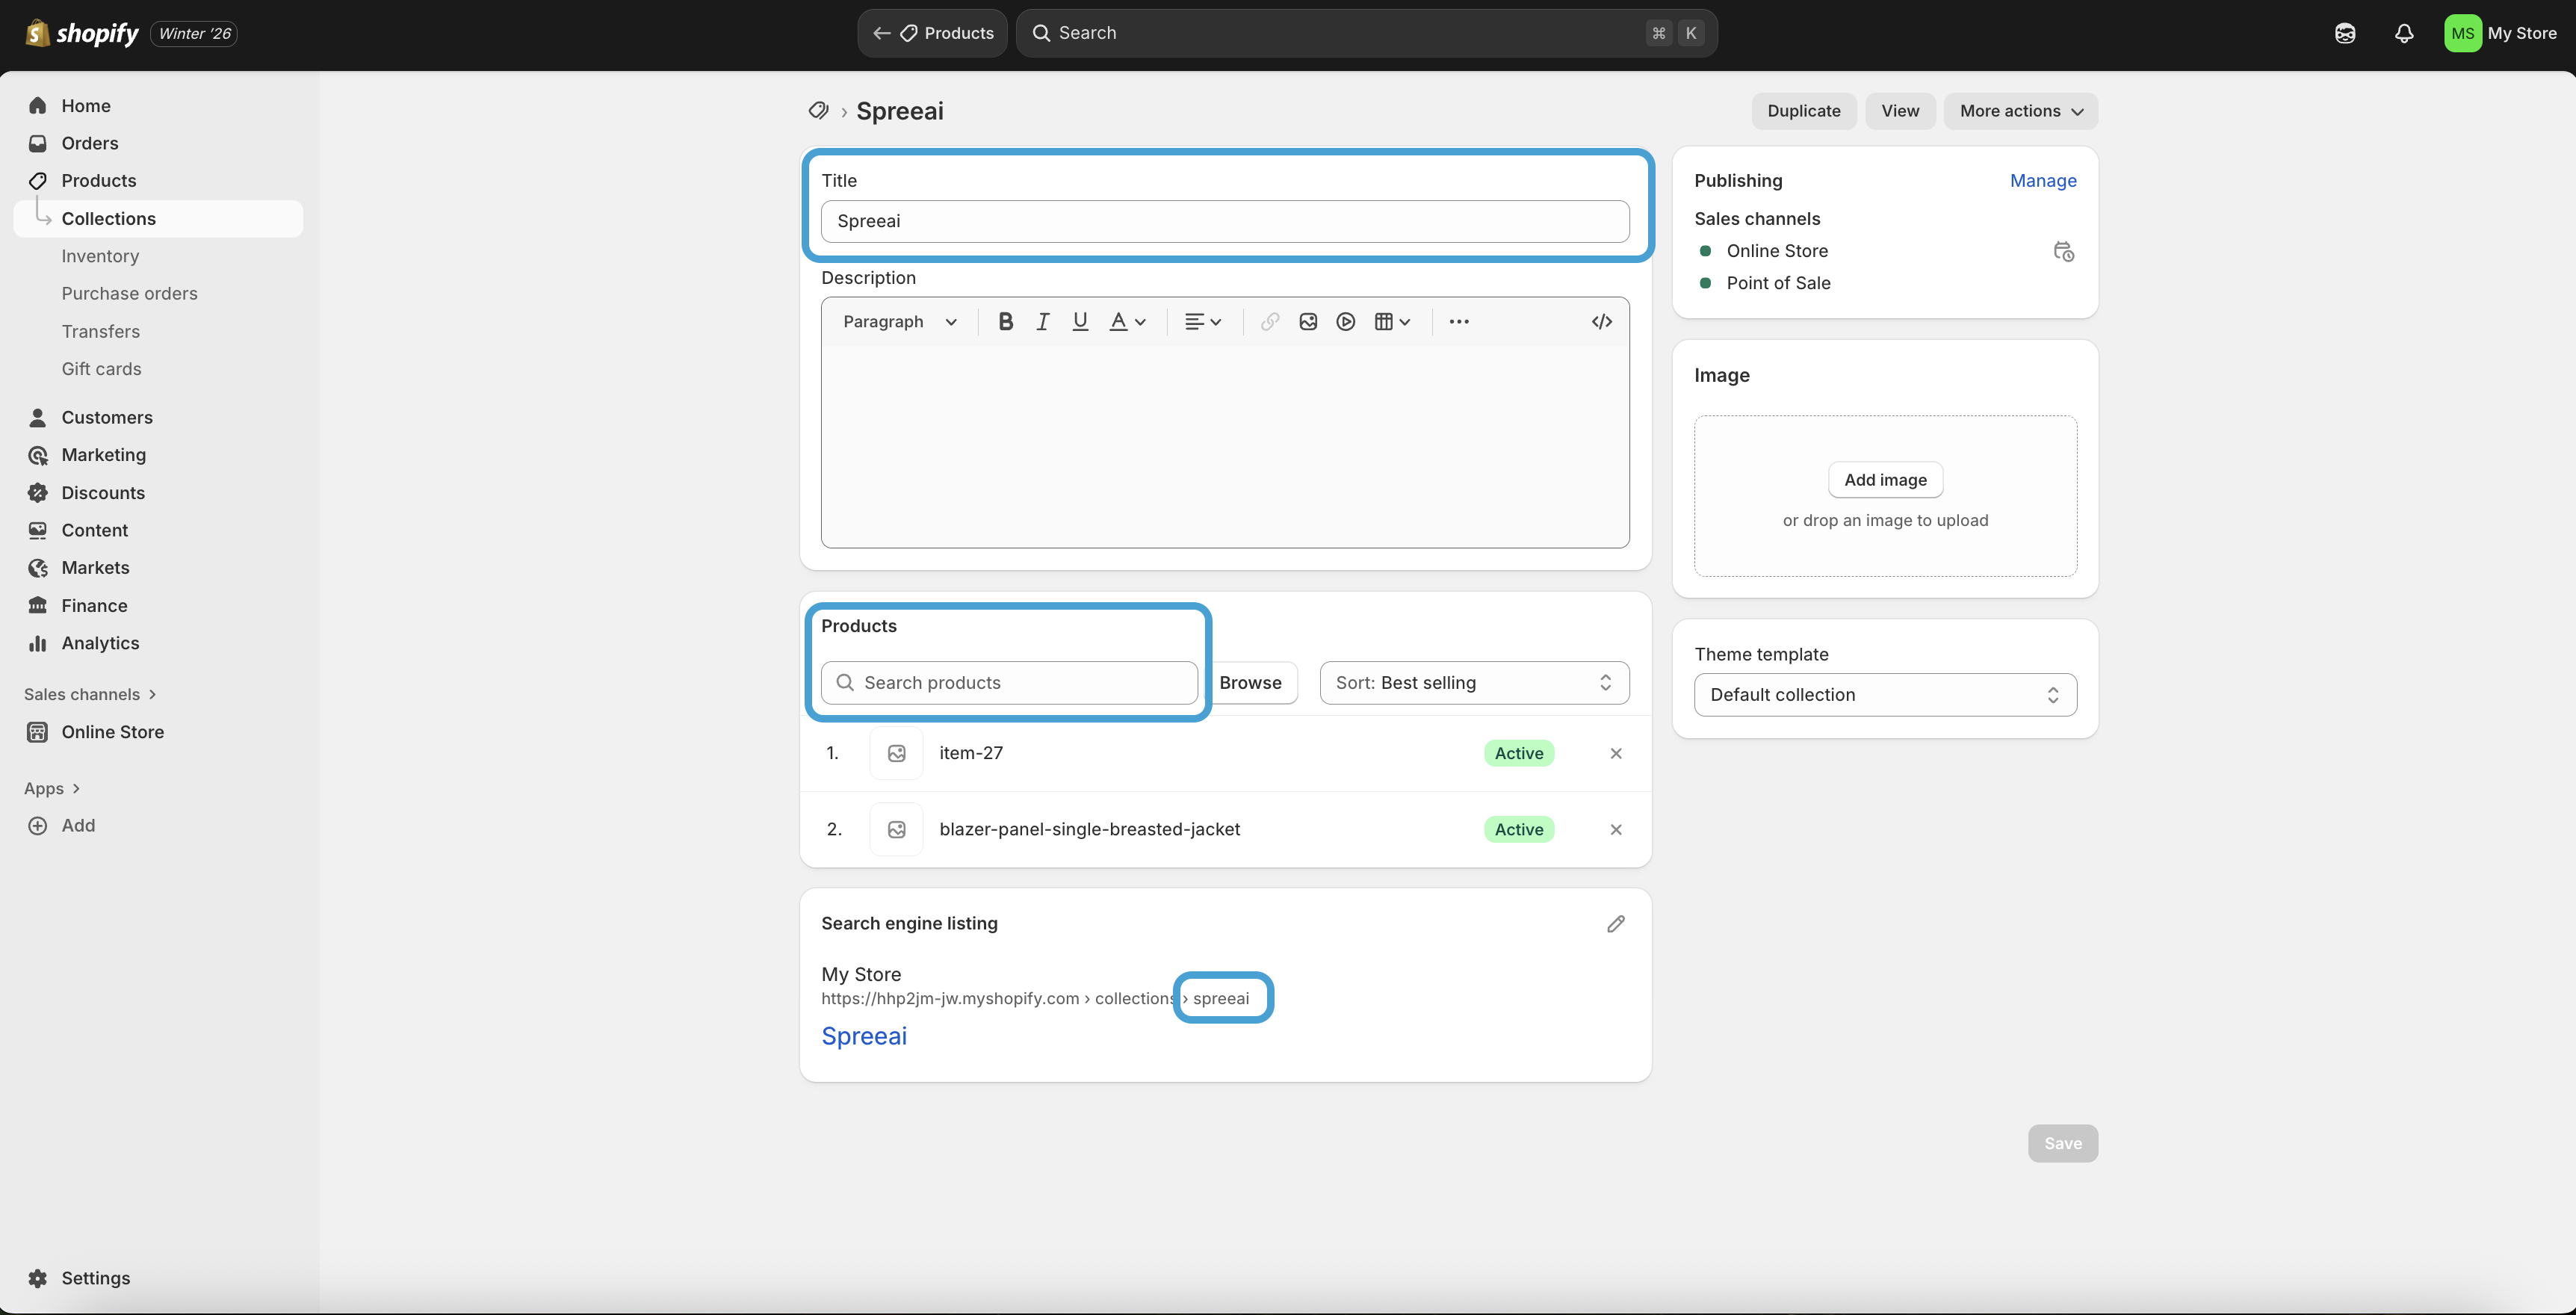
Then give your collection a Title, add the specific products that are ready for try-on, and click "Save". You will also need the name of your collection as it shows up in your "Search engine listing" as this will be used later during the integration. In the example below it is spreeai.
Integrating the SDK
-
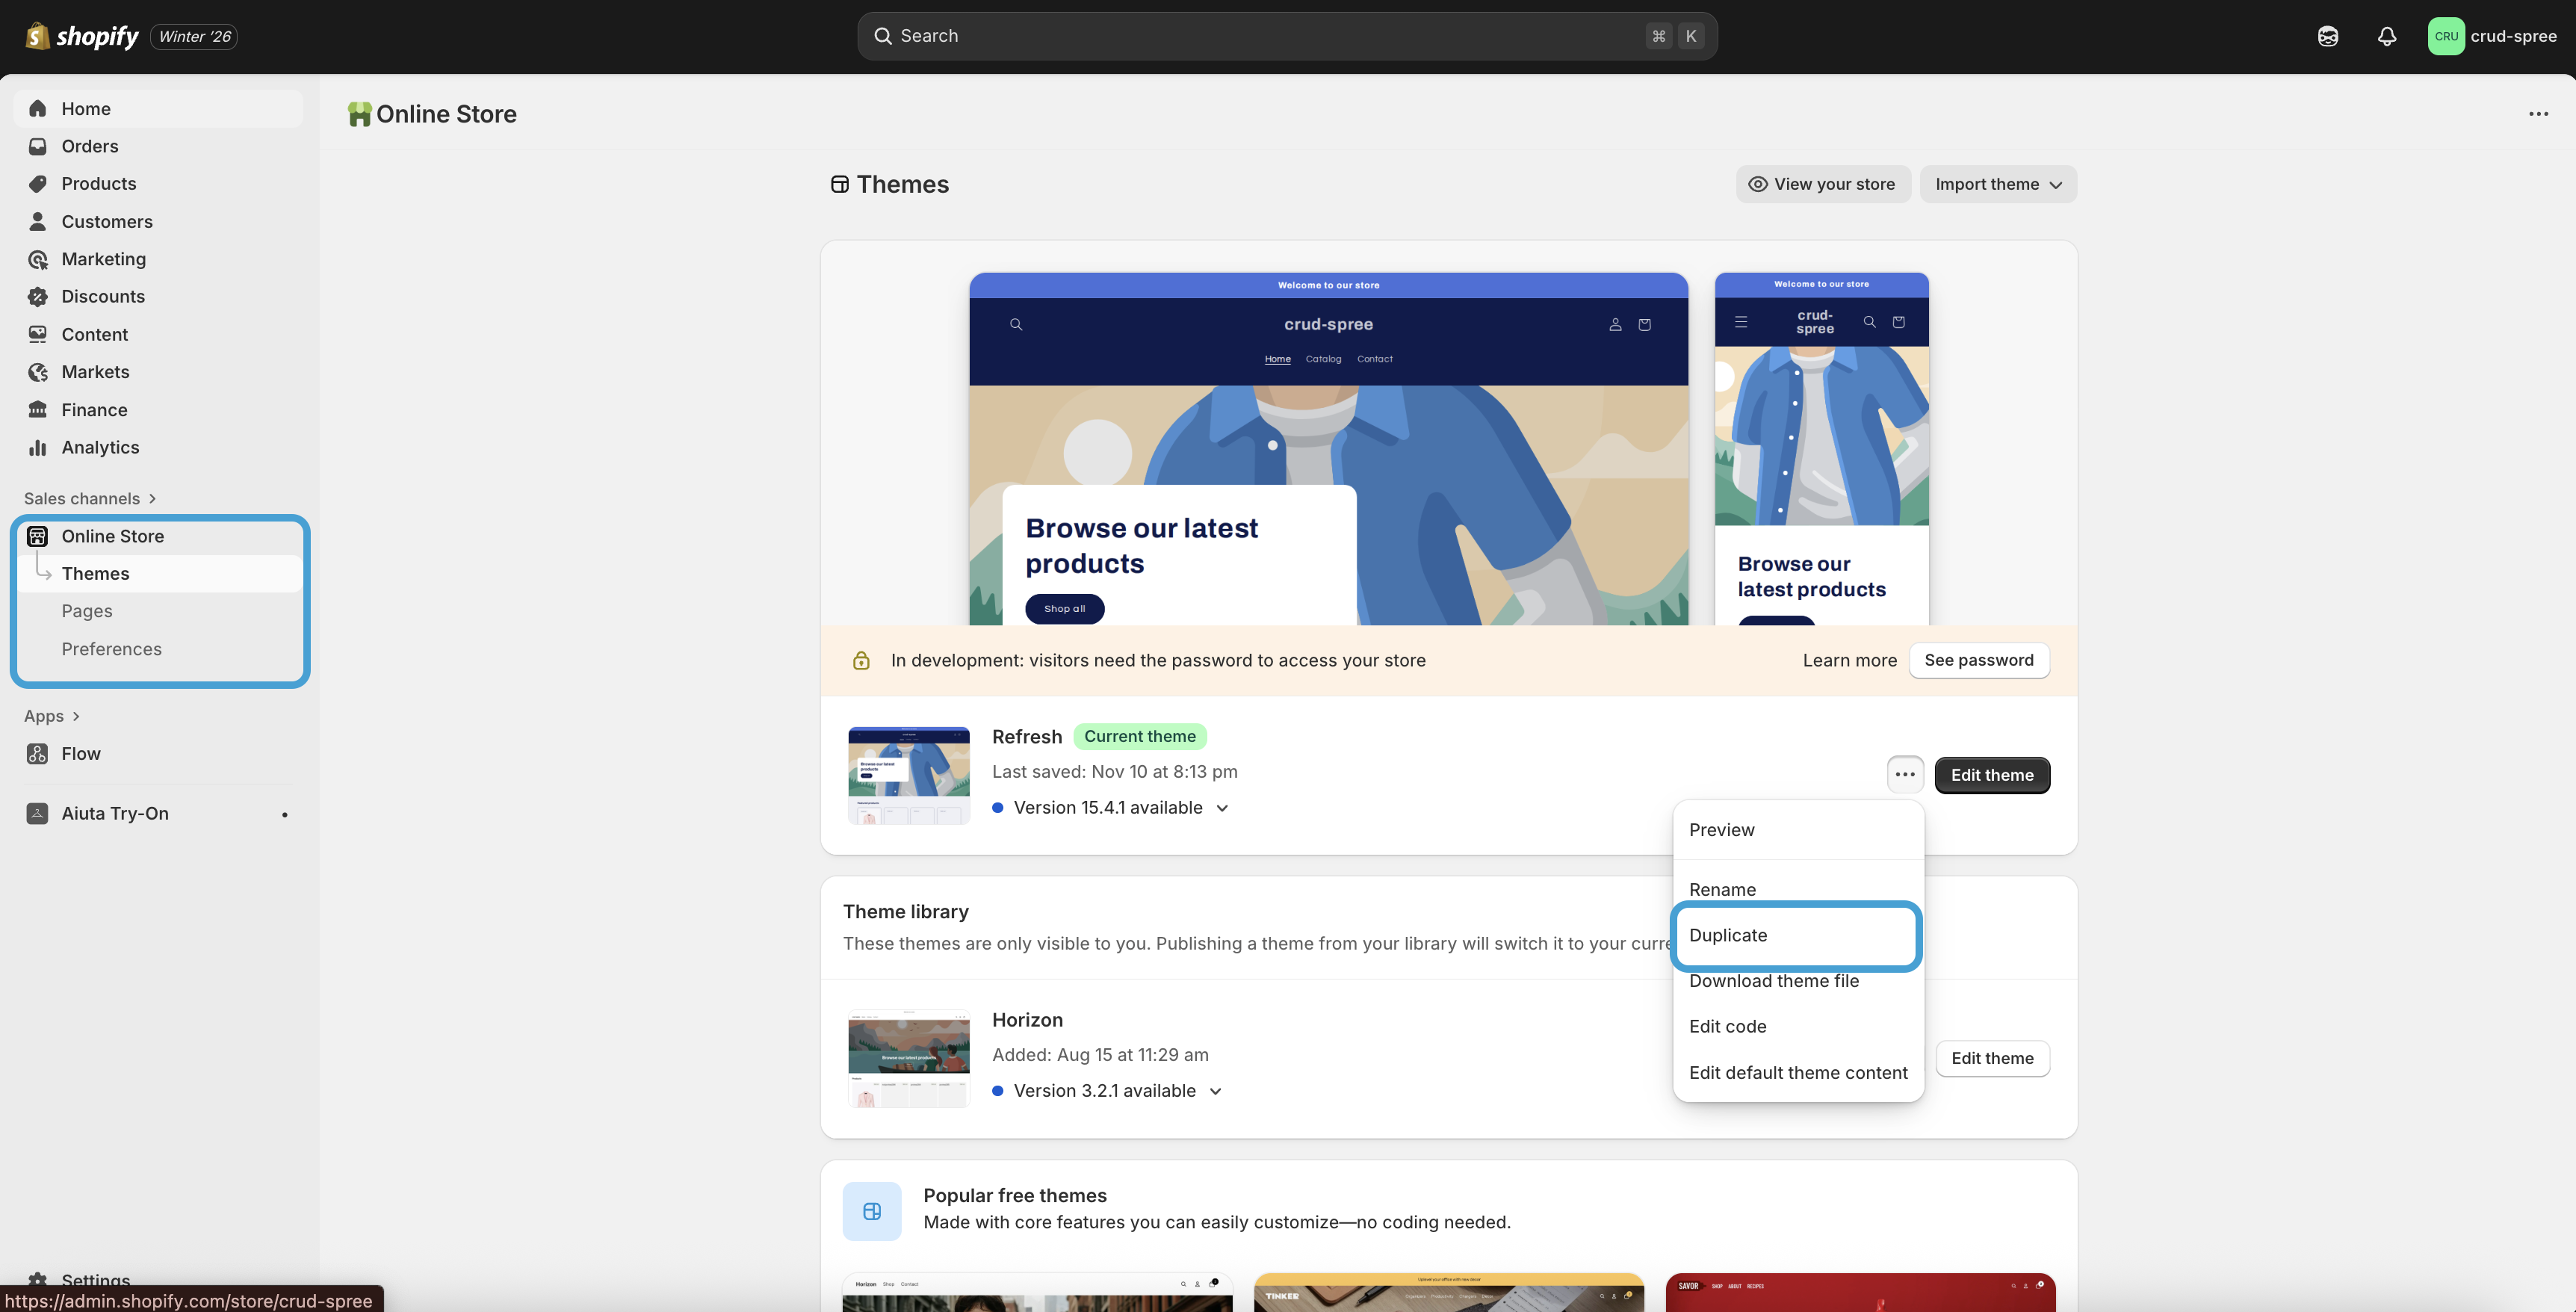
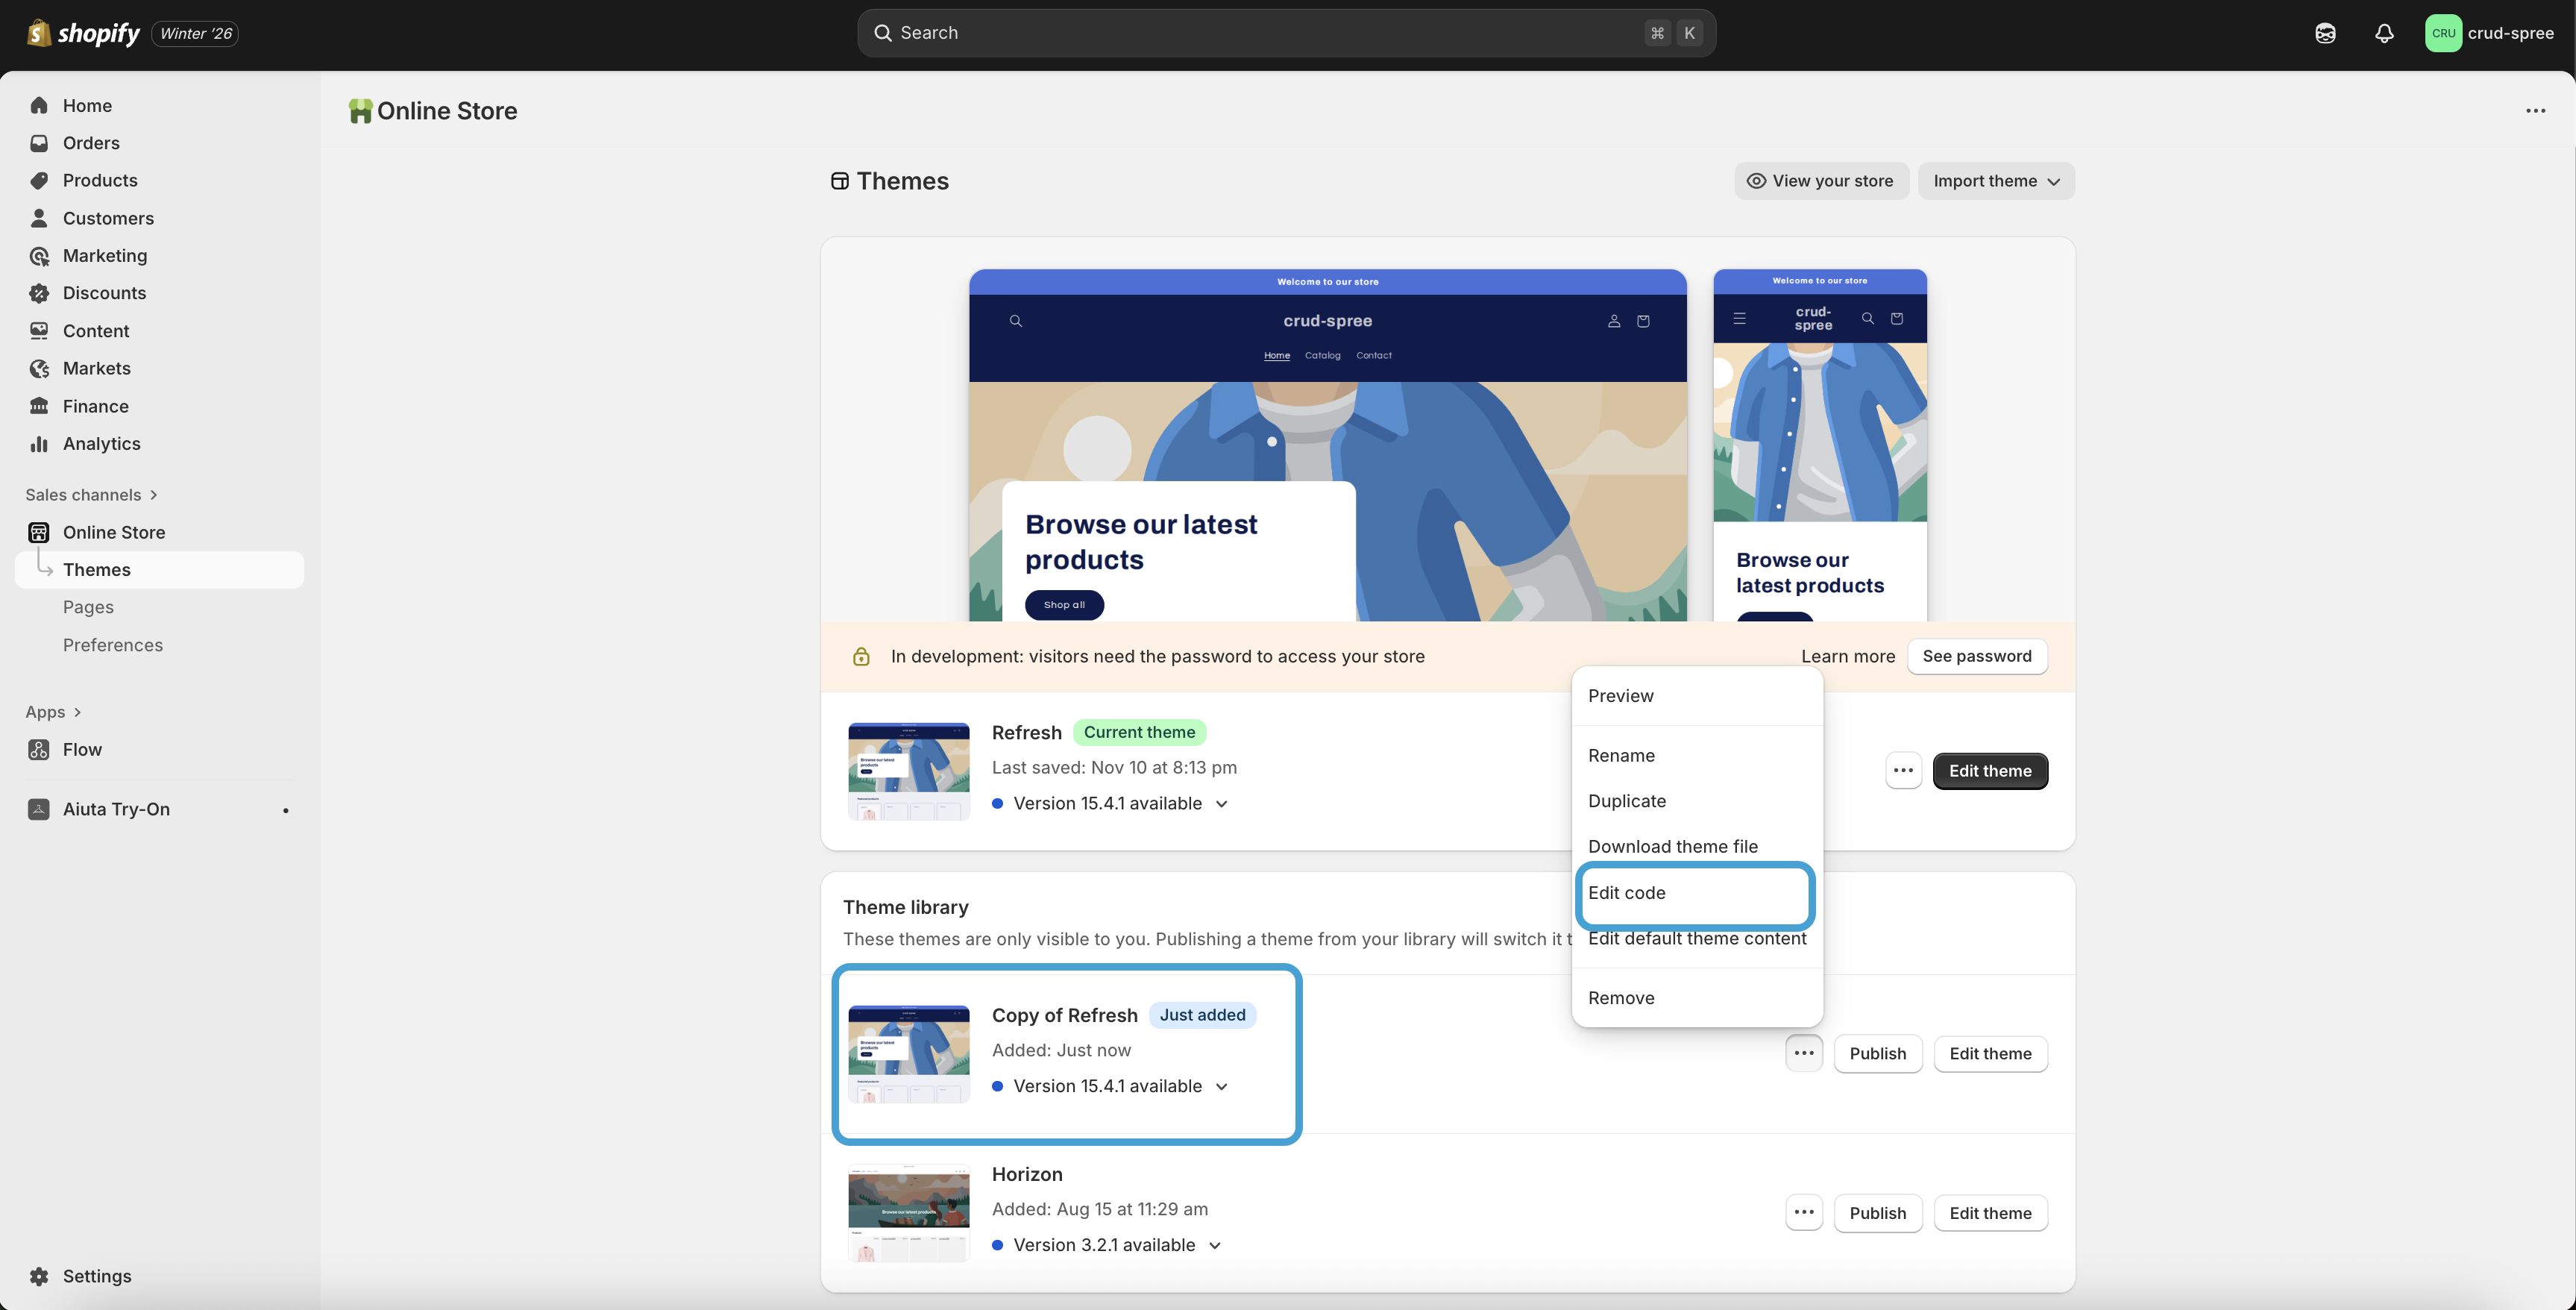
This first step is optional but highly recommended, and that's making a duplicate of your theme. This way you can make code changes and they won't affect your live shop and you can publish the changes after confirming everything is working. Go to your Store Dashboard > Sales Channels > Online Store > Themes then use the ... button to open the menu and click “Duplicate”.
-
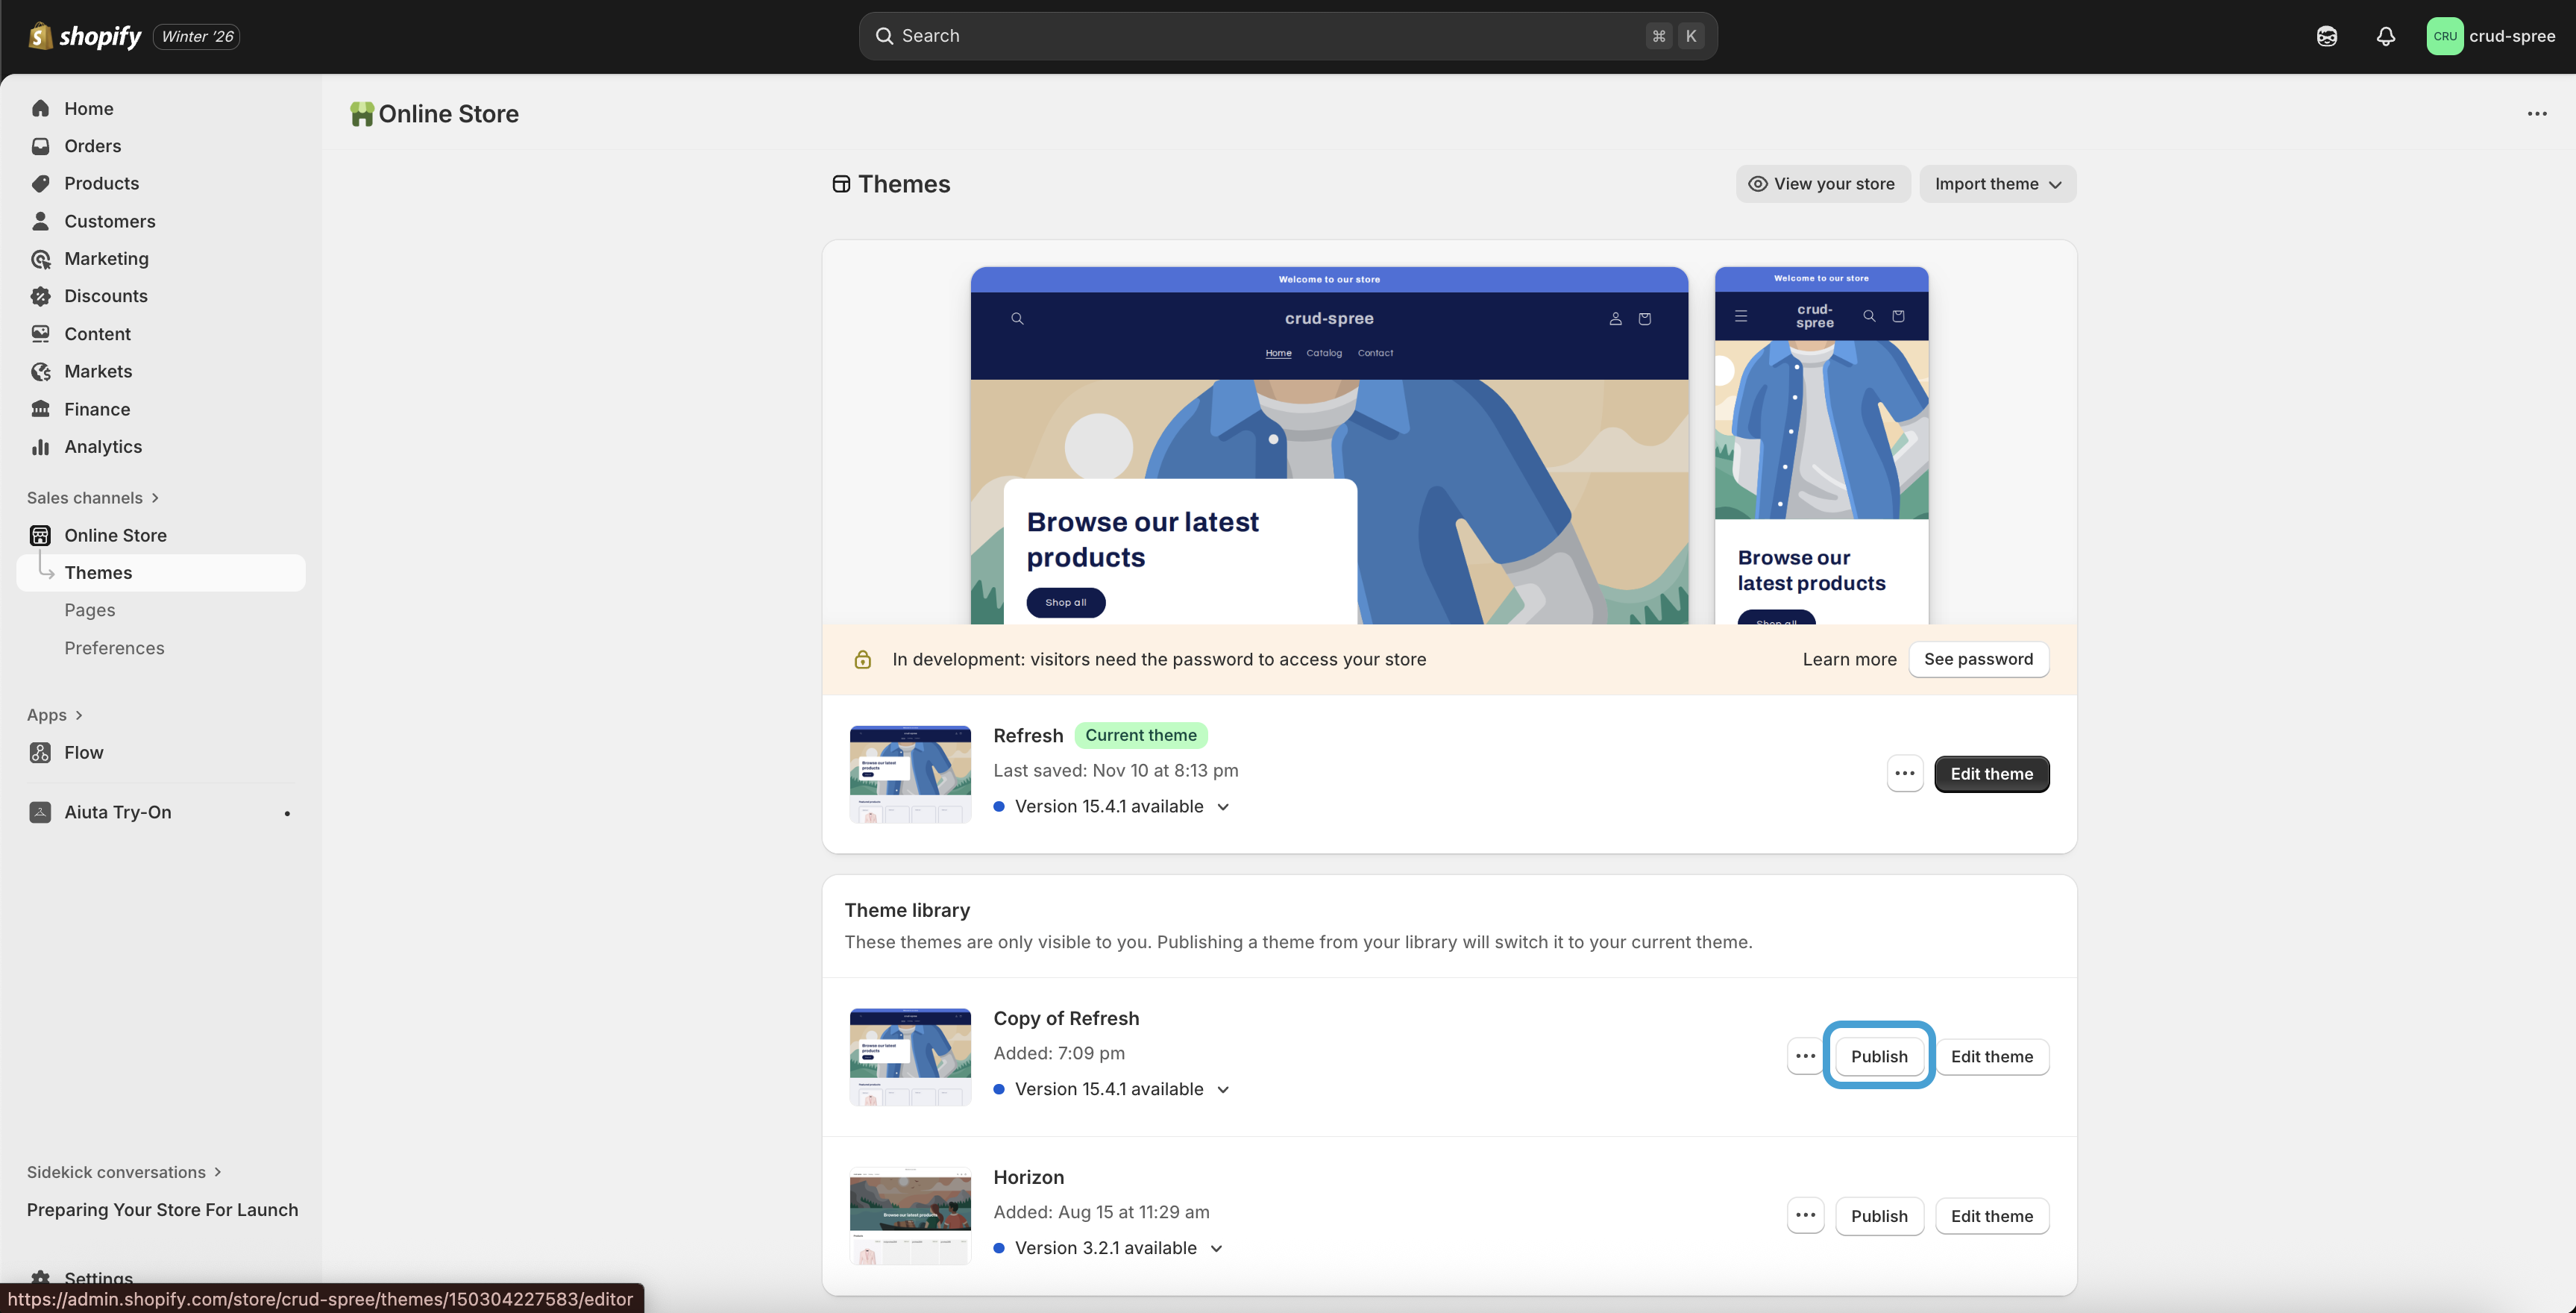
You should now see a new copy of your theme in your "Theme Library" that we can safely work off of. Click the ... button to open the menu and click "Edit code" to open the code editor.
-
Open the
theme.liquidfile inside of the/layoutfolder and scroll down to the closing</head>tag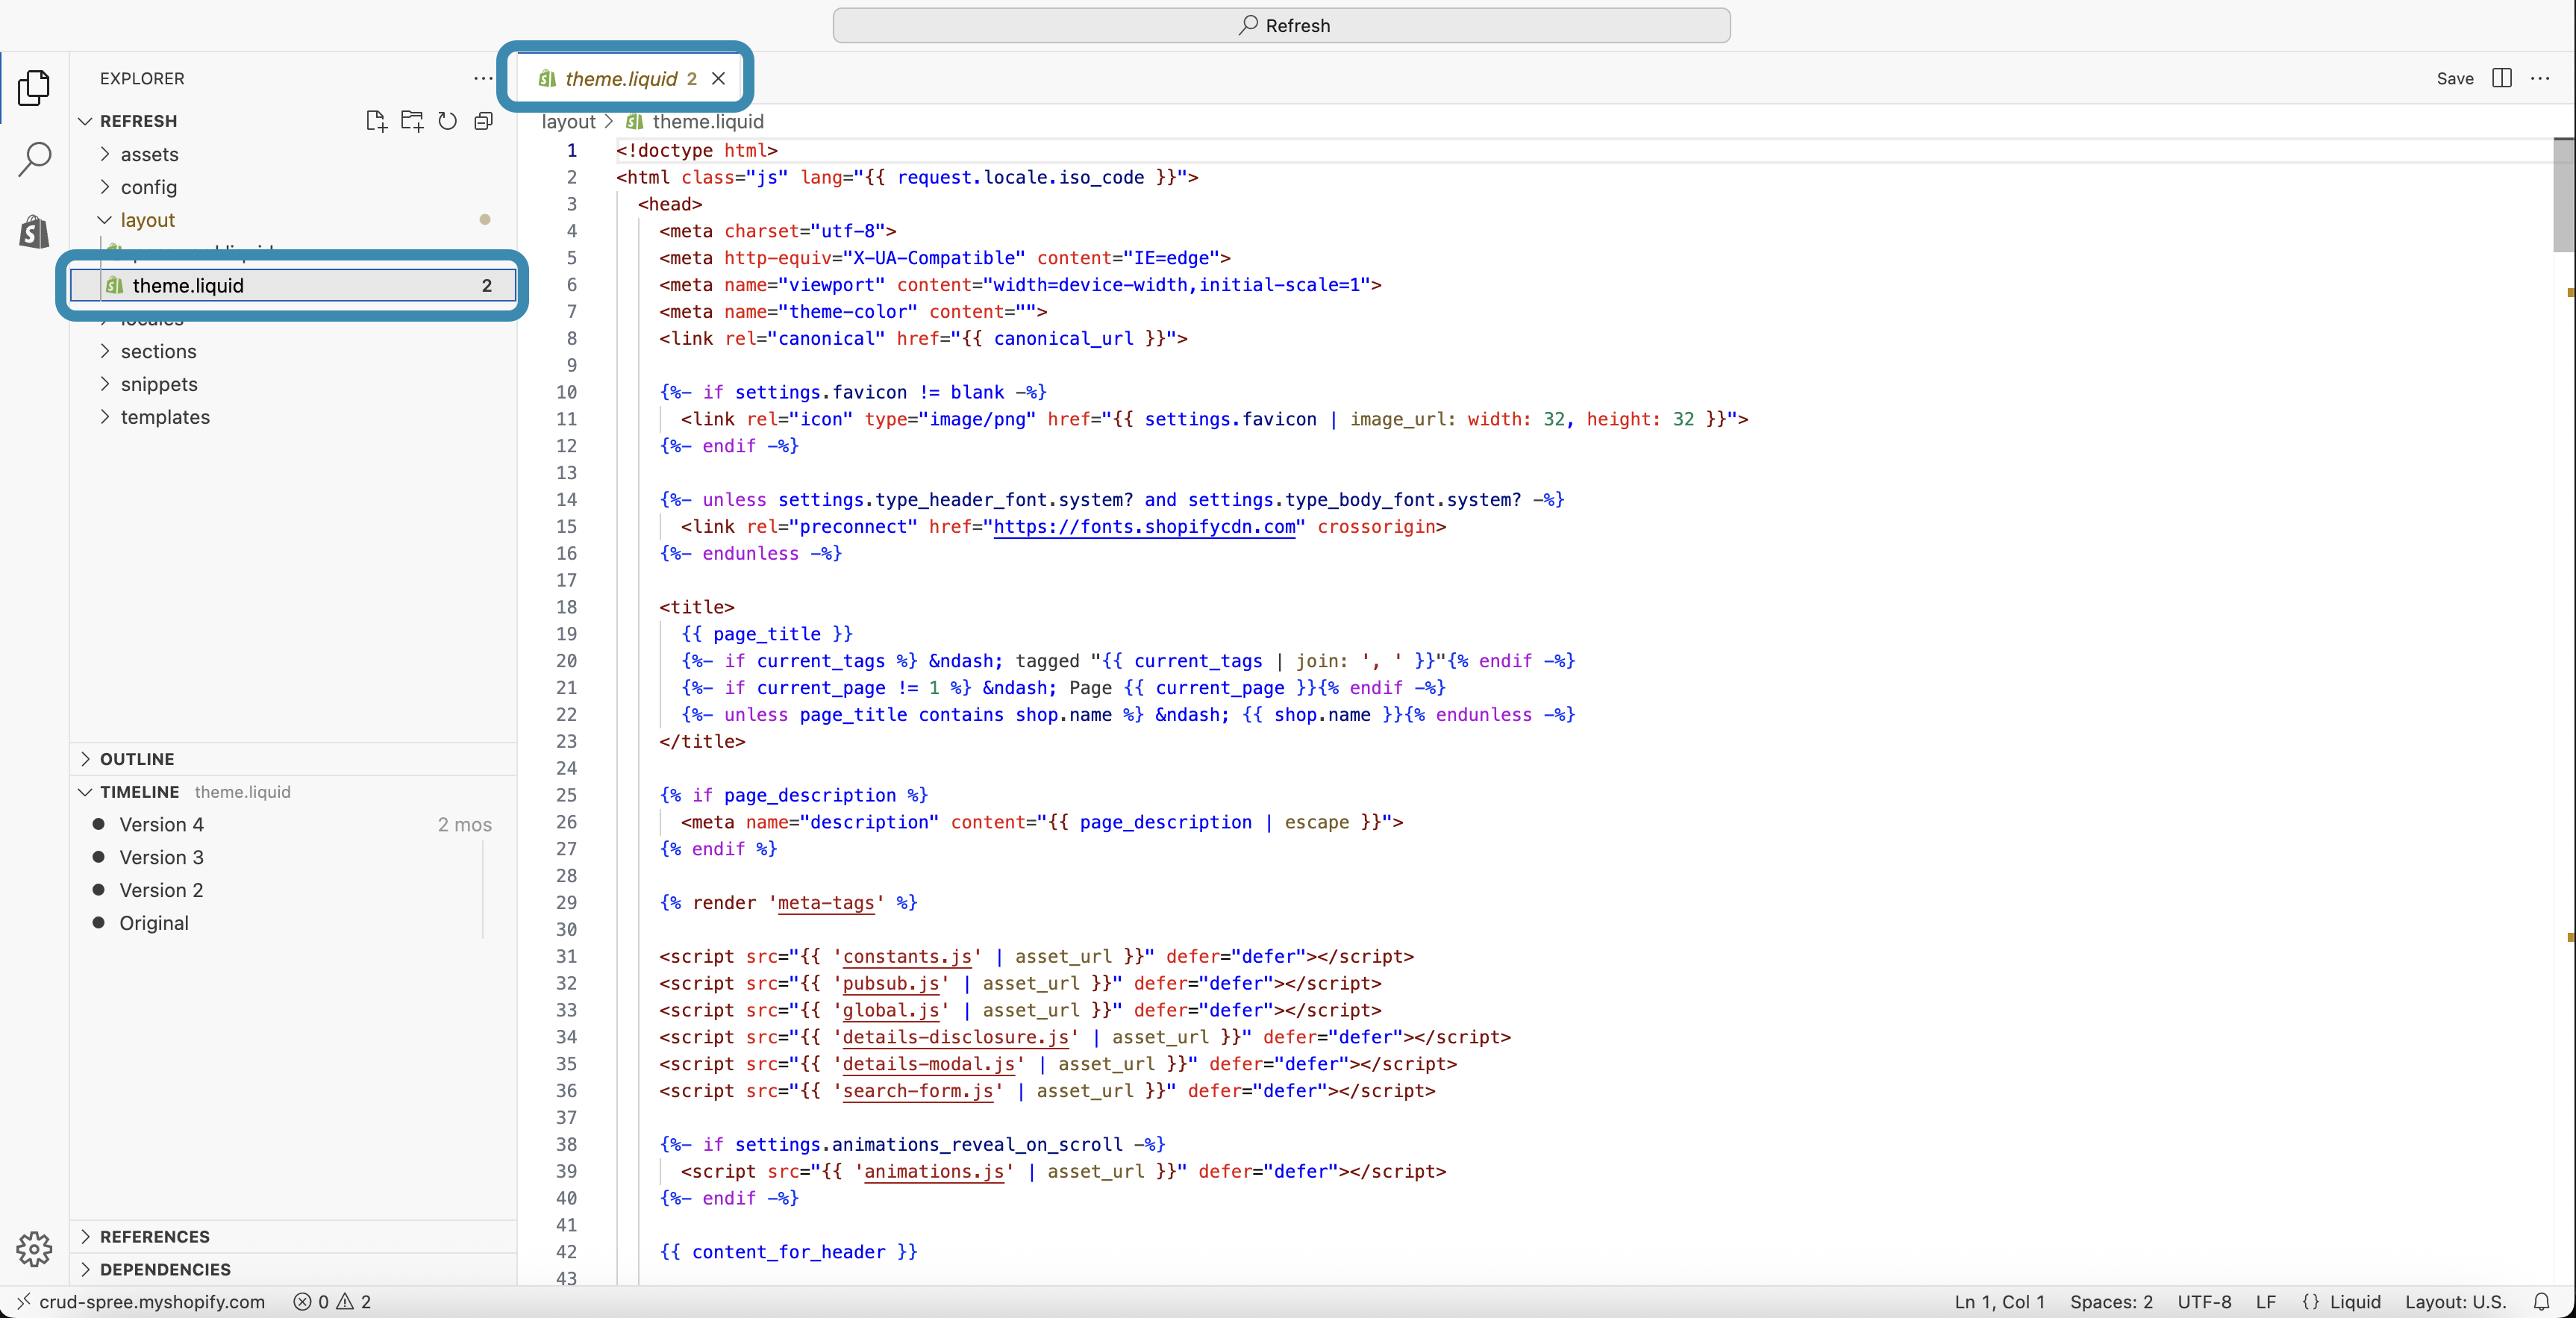
-
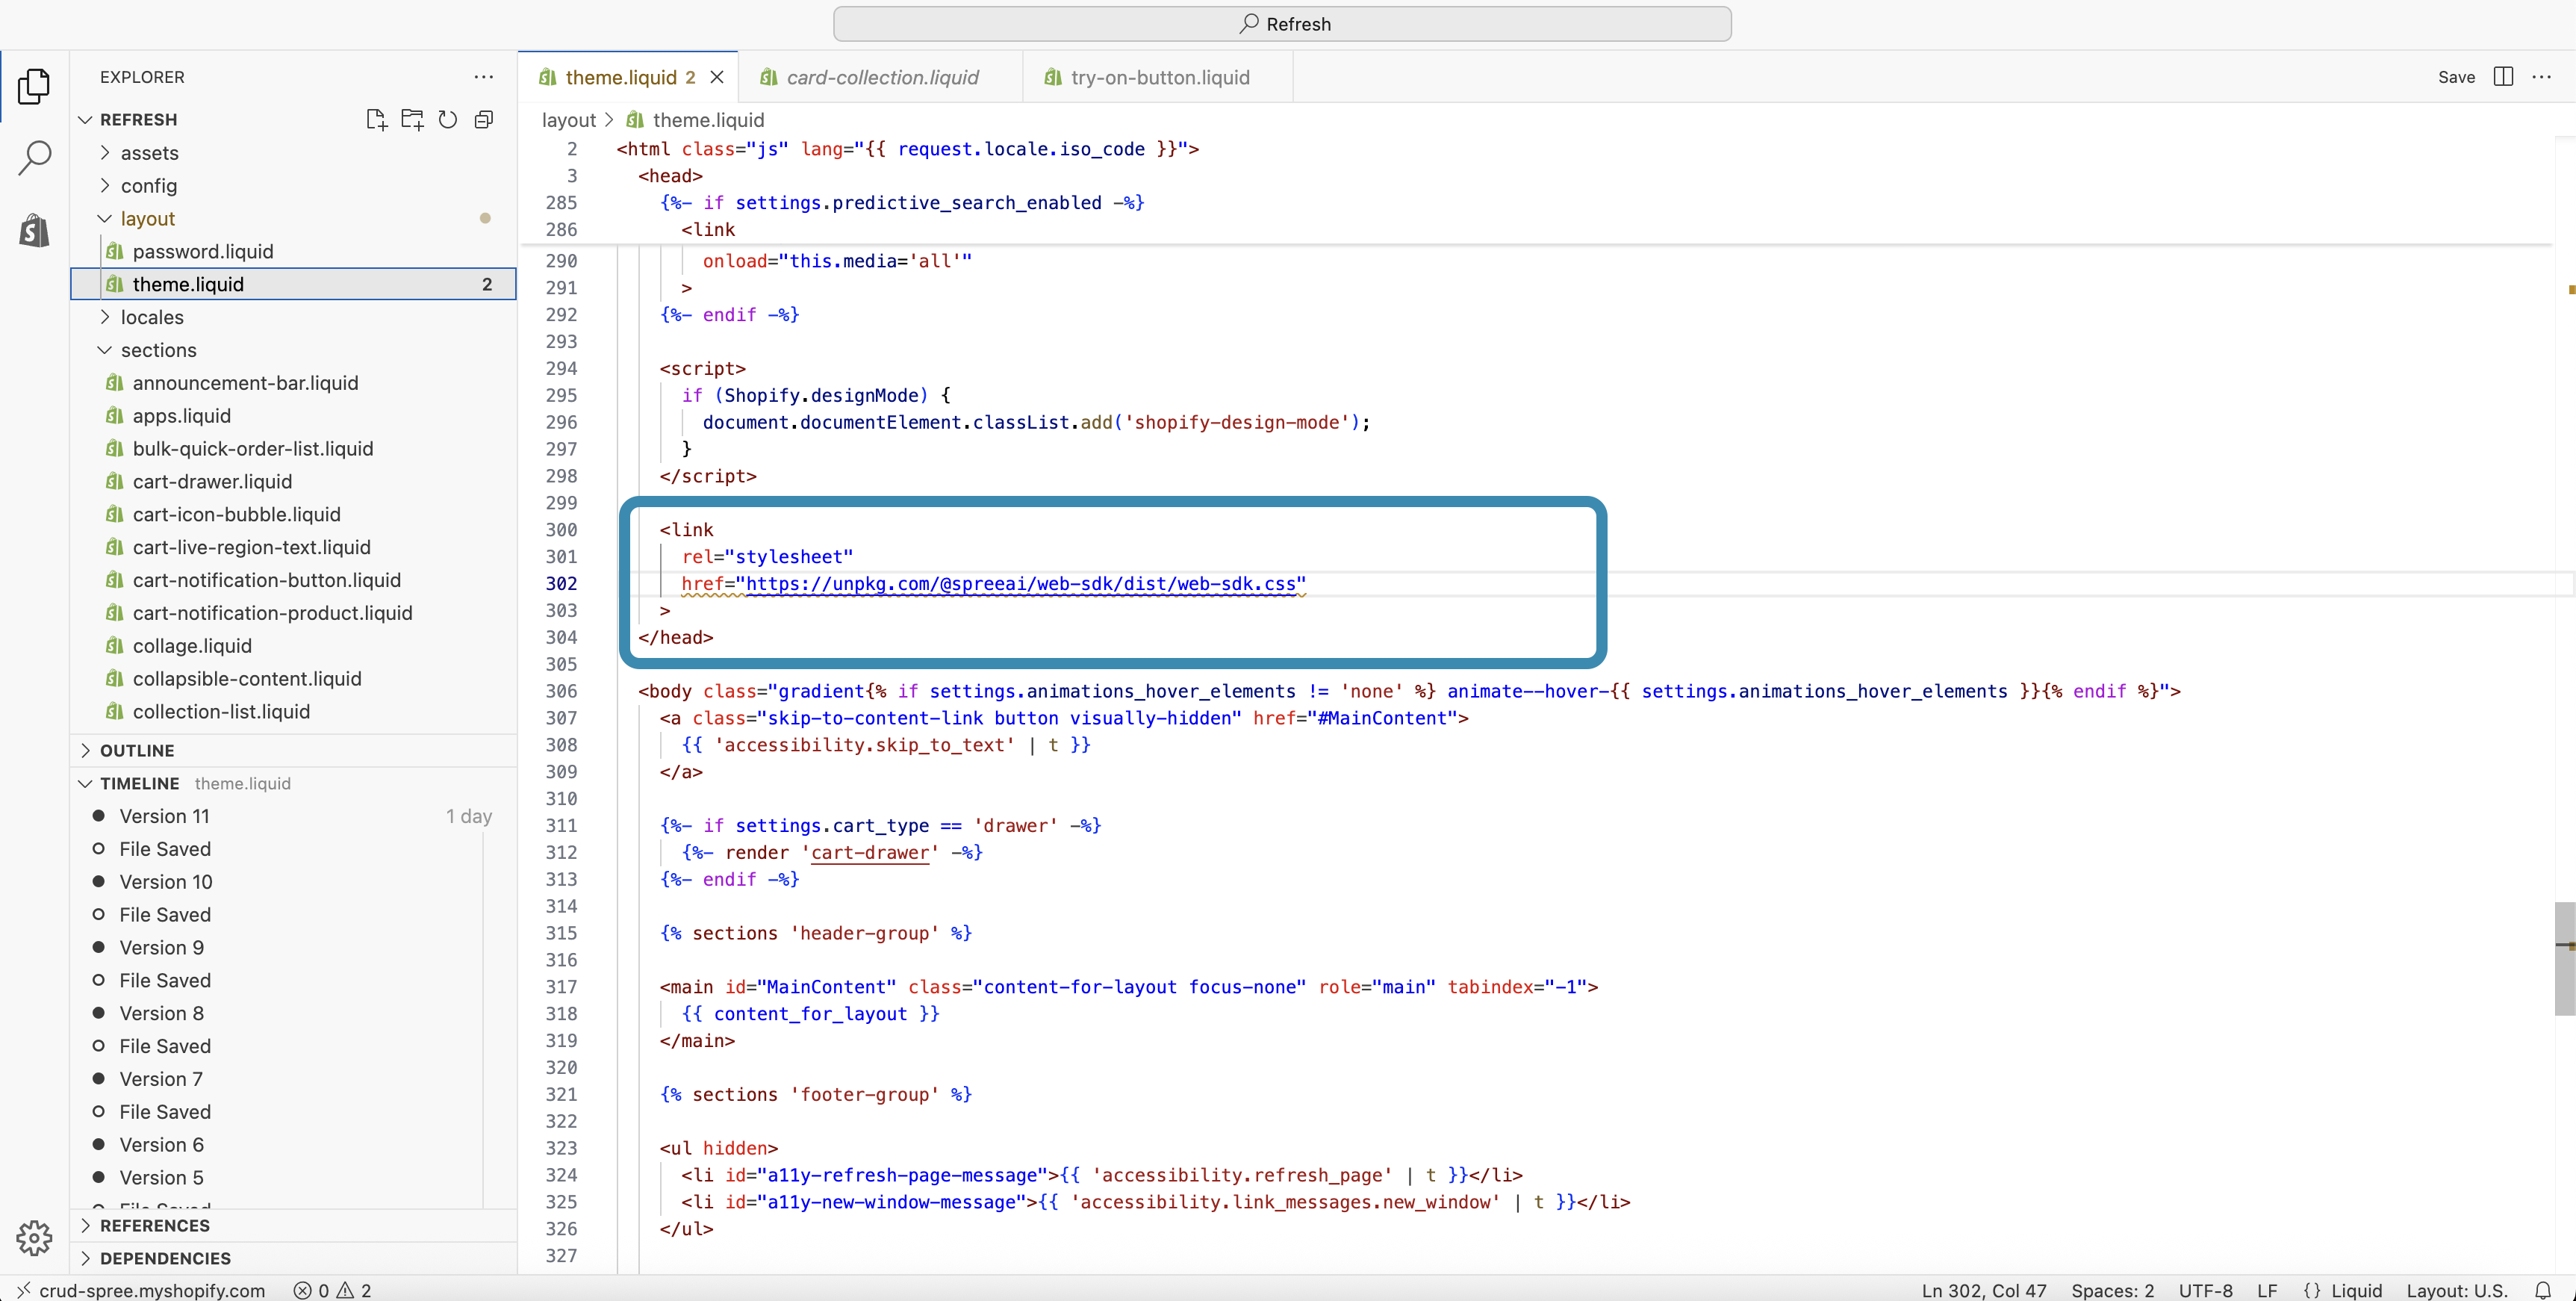
Copy and paste the code snippet below right before the closing
</head>tag to add the stylesheet for the SDK.<link
rel="stylesheet"
href="https://unpkg.com/@spreeai/web-sdk@3.0.0/dist/web-sdk.css"
/>
-
You've successfully imported the SDK's stylesheet. Now navigate to the
snippetsfolder and create a new file calledtry-on-button.liquid. Copy and paste the code snippet below into the file.<div id="spreeai-try-on"></div>
<script type="module">
import { init } from "https://unpkg.com/@spreeai/web-sdk@3.0.0/dist/@spreeai/web-sdk.js";
const url = window.location.href.split("/");
const productsIndex = url.indexOf("products");
if (productsIndex !== -1) {
const productId = url[productsIndex + 1].split("?")[0];
const sdk = await init({
clientId: "your_client_id",
});
if (sdk) {
await sdk.renderTryOnButton({
elementId: "spreeai-try-on",
garments: [{ garmentId: productId }],
});
}
}
</script>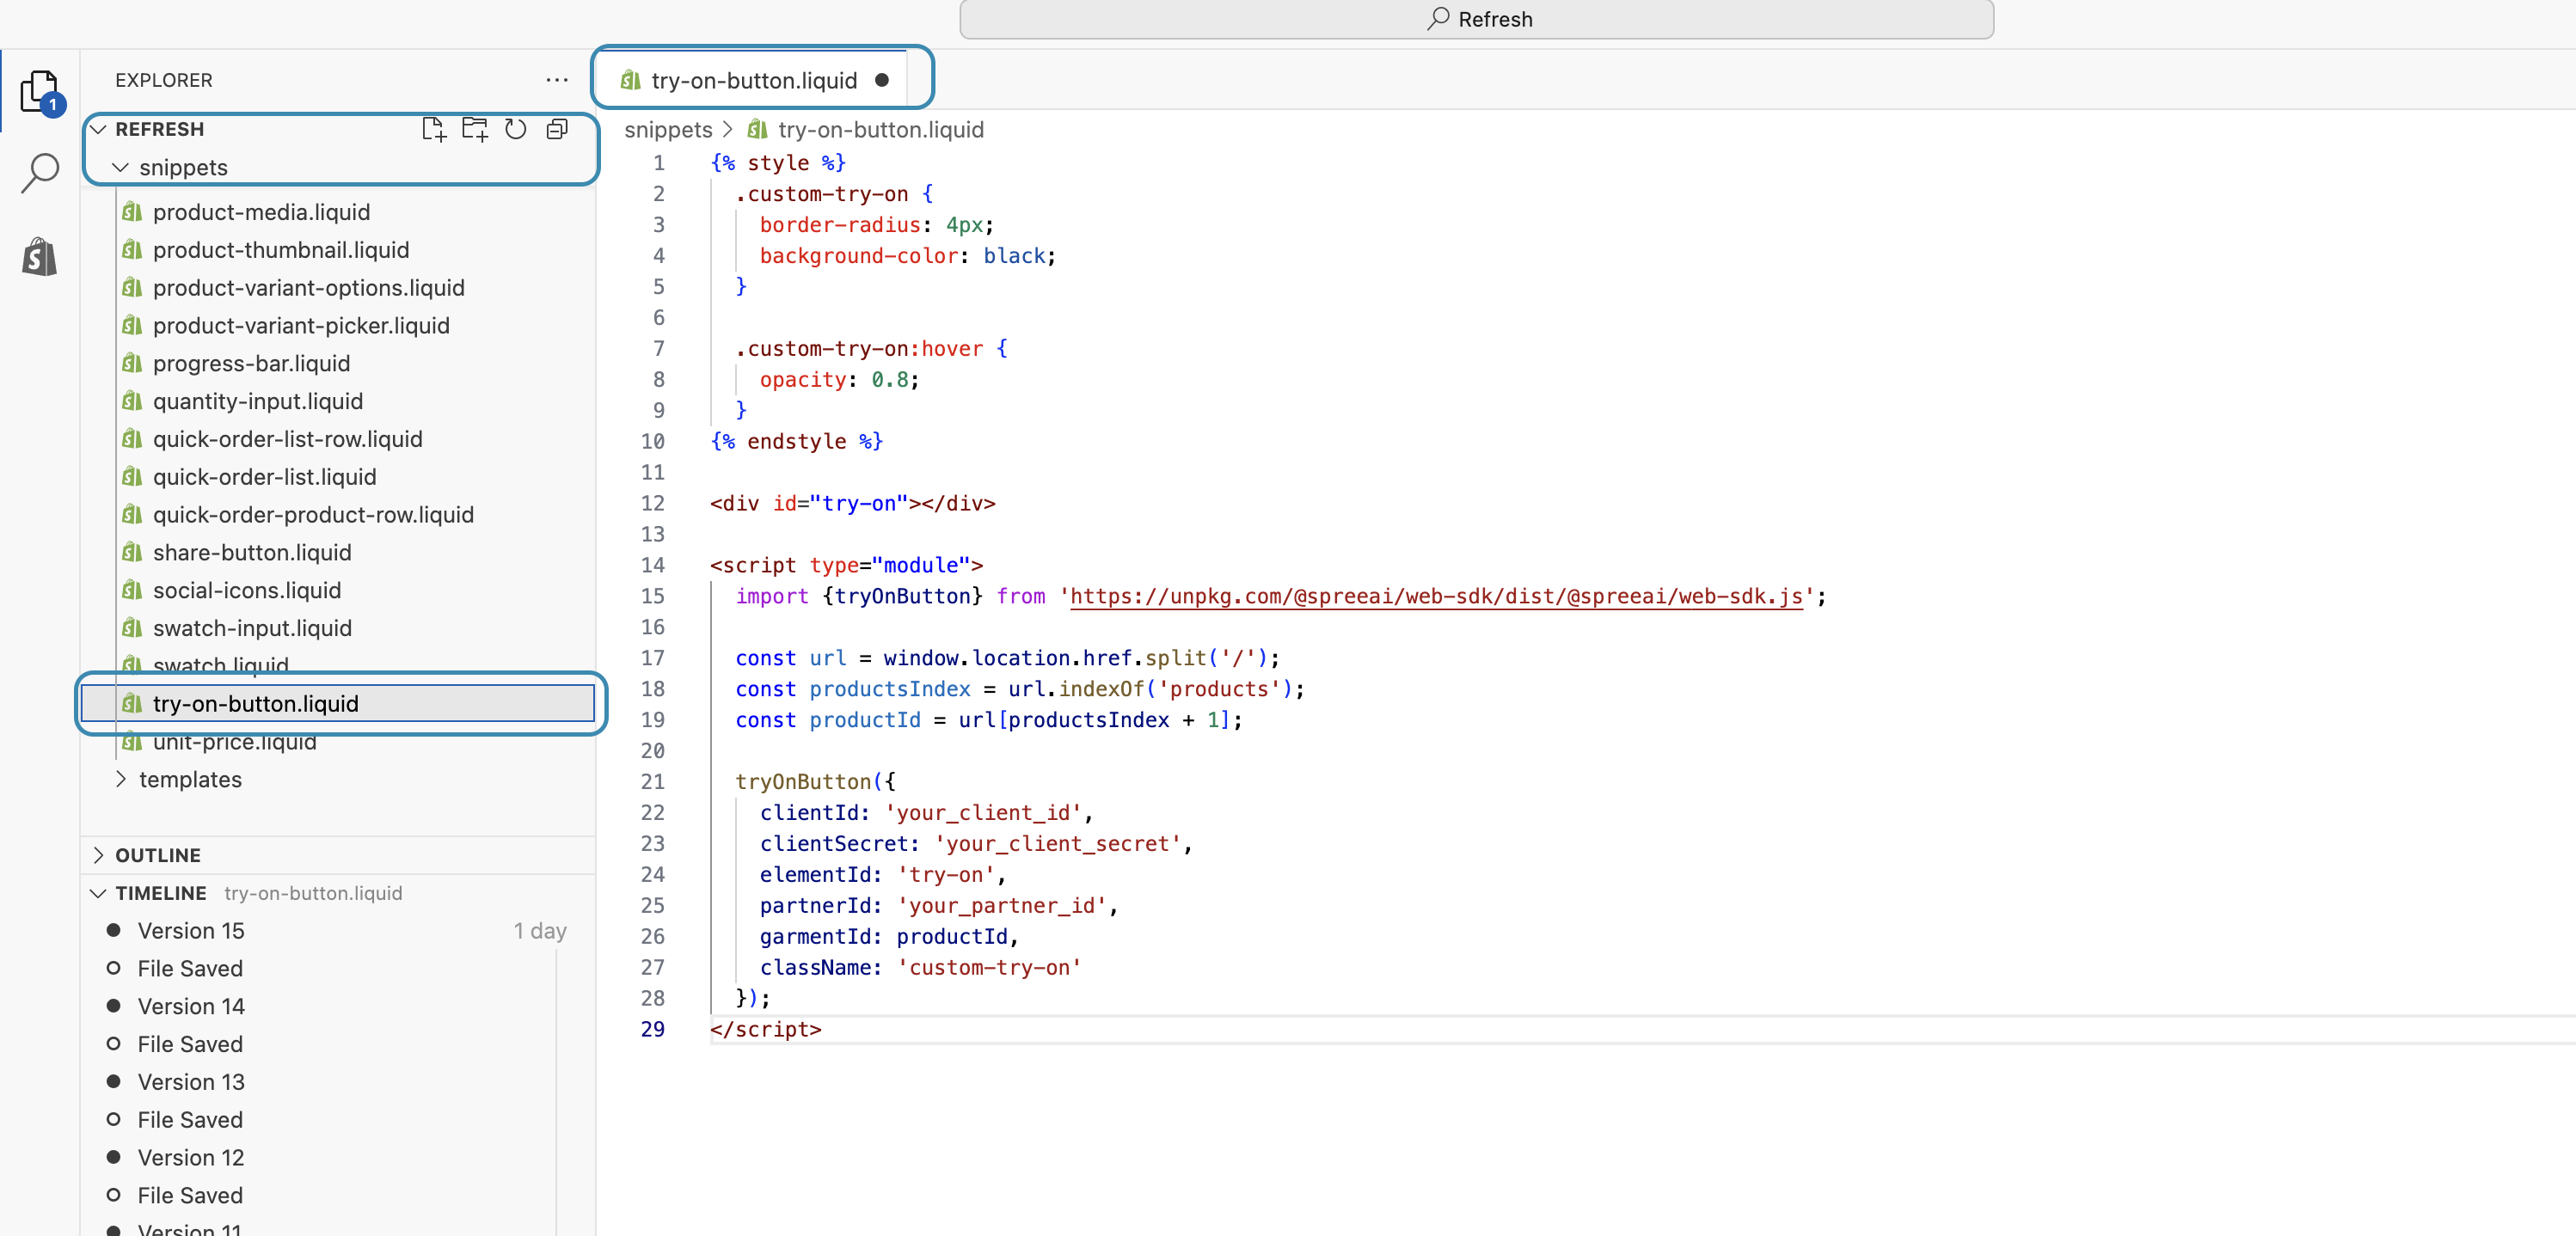
The above code will read the product ID from the product page, remove any extra parameters, initialize the SDK with
init, and render the try-on button. Replaceyour_client_idwith the client ID provided to you. Your partner account is resolved from the client ID, so no partner ID is needed.See the API reference for all
renderTryOnButtonoptions. -
Next add your snippet to your product page. Within the
sectionsfolder, navigate tomain-product.liquidand add the code snippet below where you want the button to appear. Depending on the theme you're using this may not always be the location for you to add your button. You may need to add this to another snippet that is used within yourmain-product.liquidif your button doesn't appear in the right place initially.If you created a collection for your products, use the following code snippet and replace
your-collectionwith the name of your collection that was created in the steps above. This checks if the product exists in that collection and only renders the button if so.{% for c in product.collections %}
{% if c.handle == 'your-collection' %}
{% assign in_target_collection = true %}
{% break %}
{% endif %}
{% endfor %}
{% if in_target_collection %}
{% render 'try-on-button' %}
{% endif %}If you're not using a collection, you can simply add the following snippet
{% render 'try-on-button' %}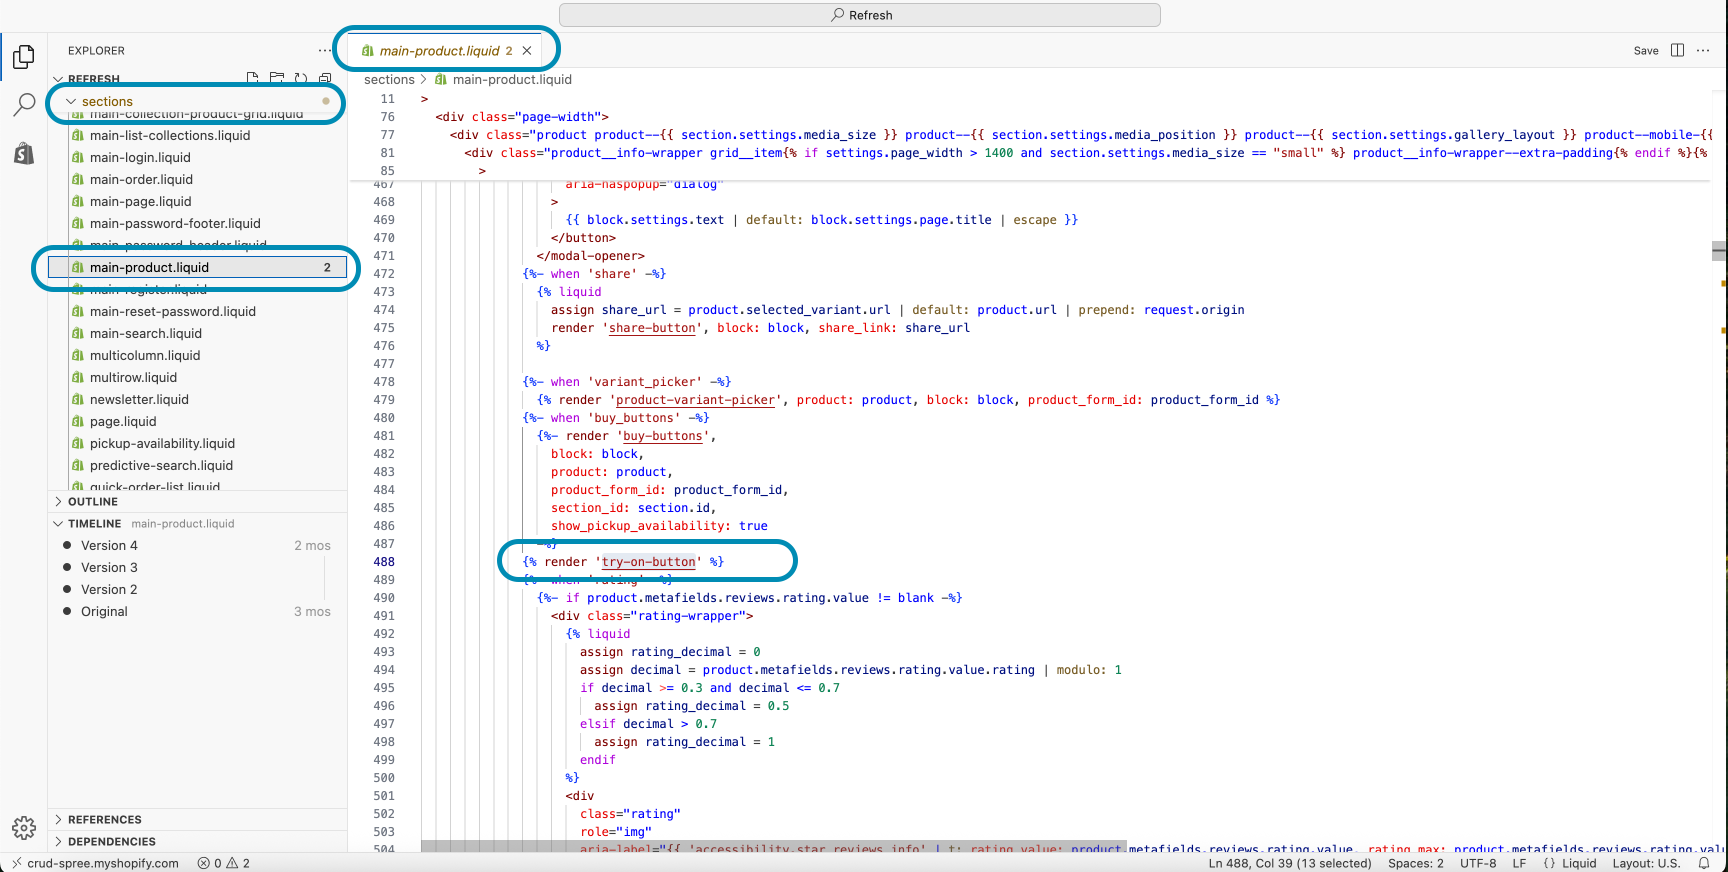
-
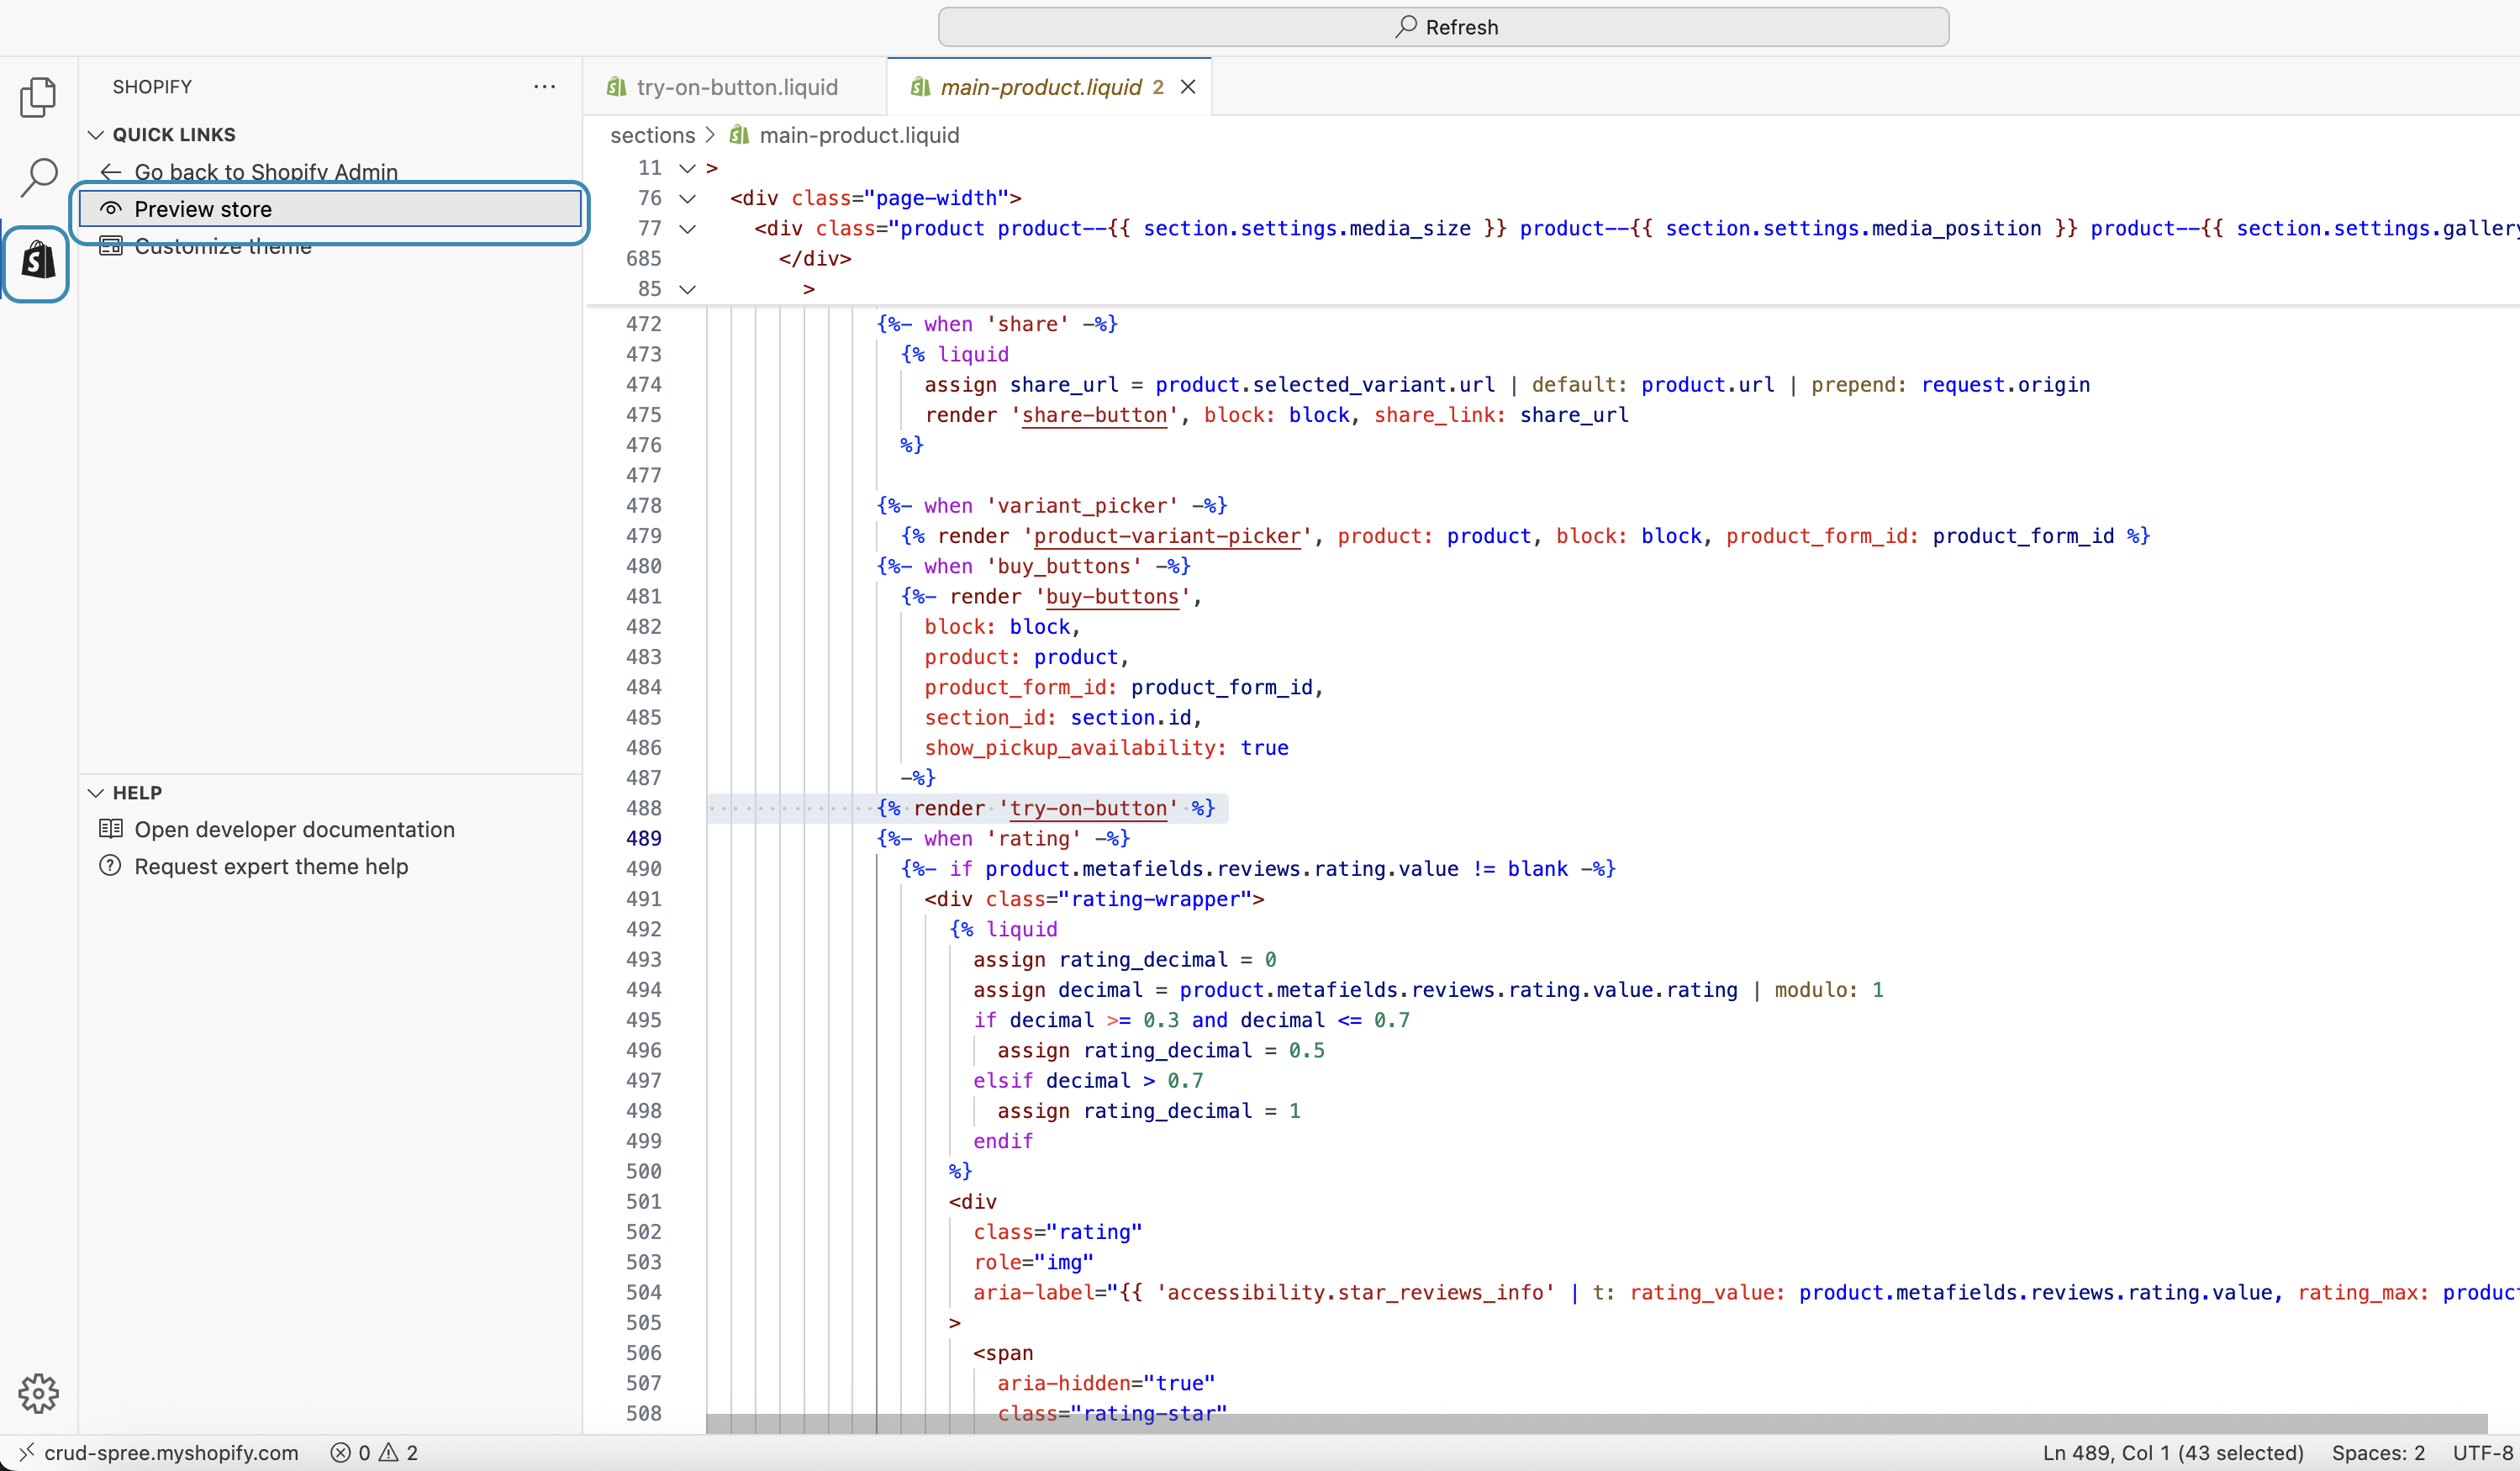
Once you're finished and ready to preview the changes to your store, select the Shopify icon from the left navigation bar and select "Preview store".
-
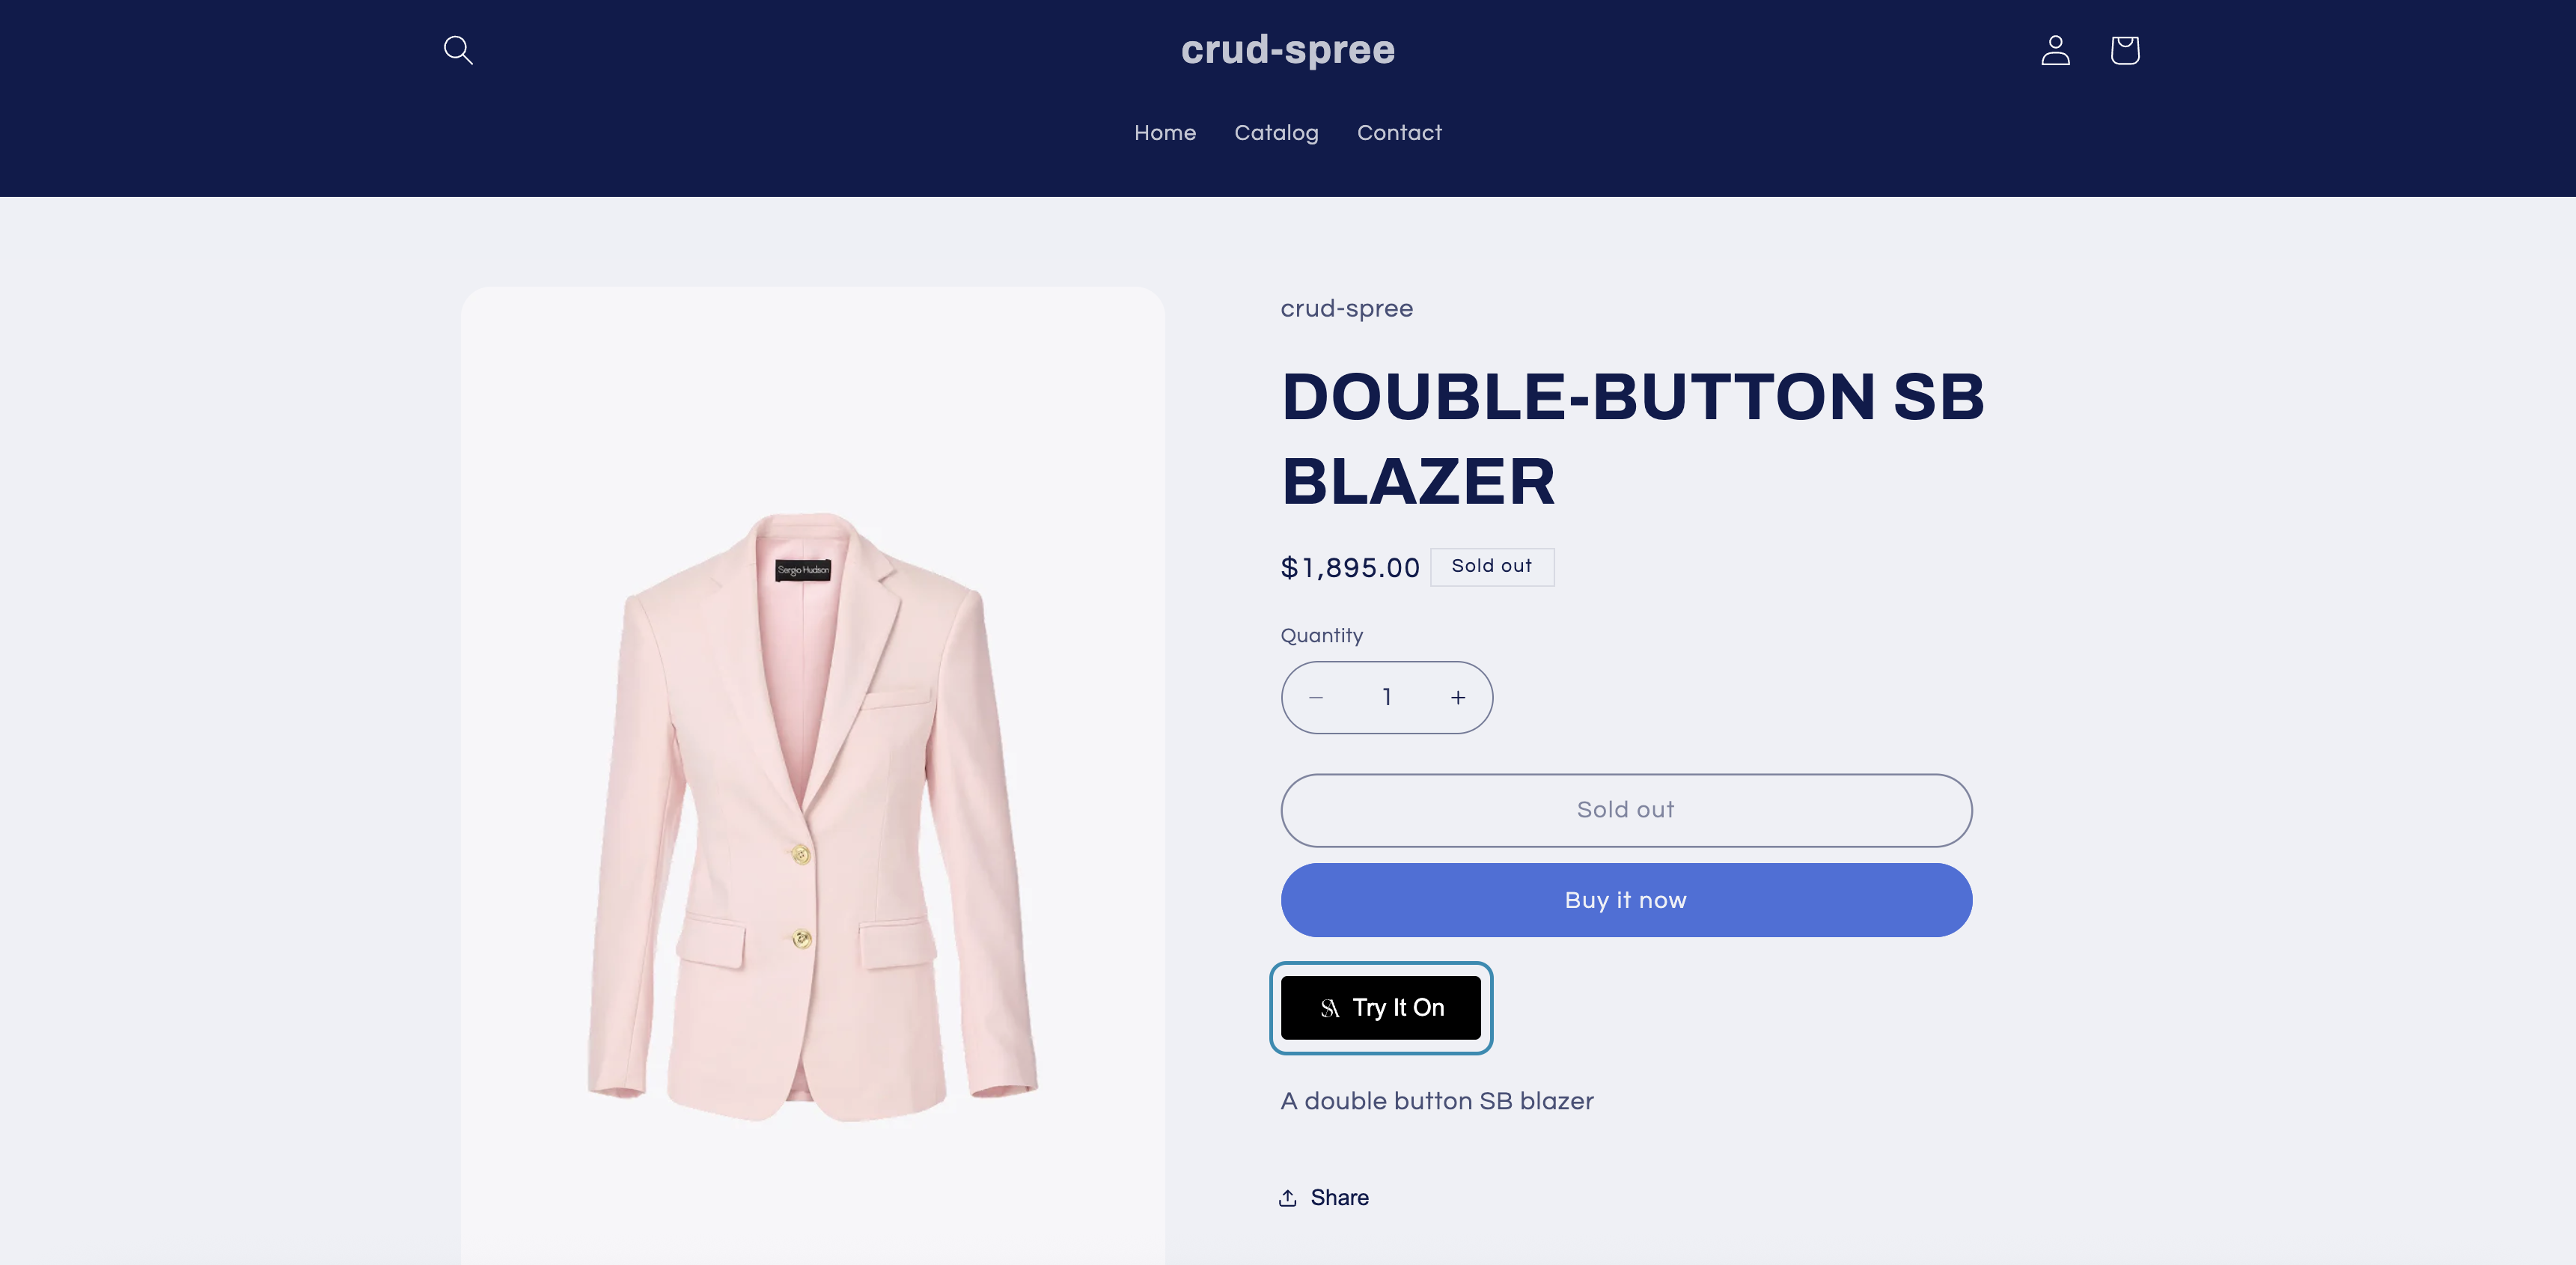
Navigate to a product page containing one of the products that are ready for try-on and you should see the Try It On button rendered where you placed it on your page. Visit other products and verify the button is displaying correctly.
-
If all your testing looks good and the integration is working as intended, save your changes and navigate back to your Store Dashboard > Online Store > Themes and publish the copy you've been working on. After publishing, the copy will replace your previous theme, sending it to your Theme Library. If you run into any issues you can to revert the original copy of your theme by publishing that one.