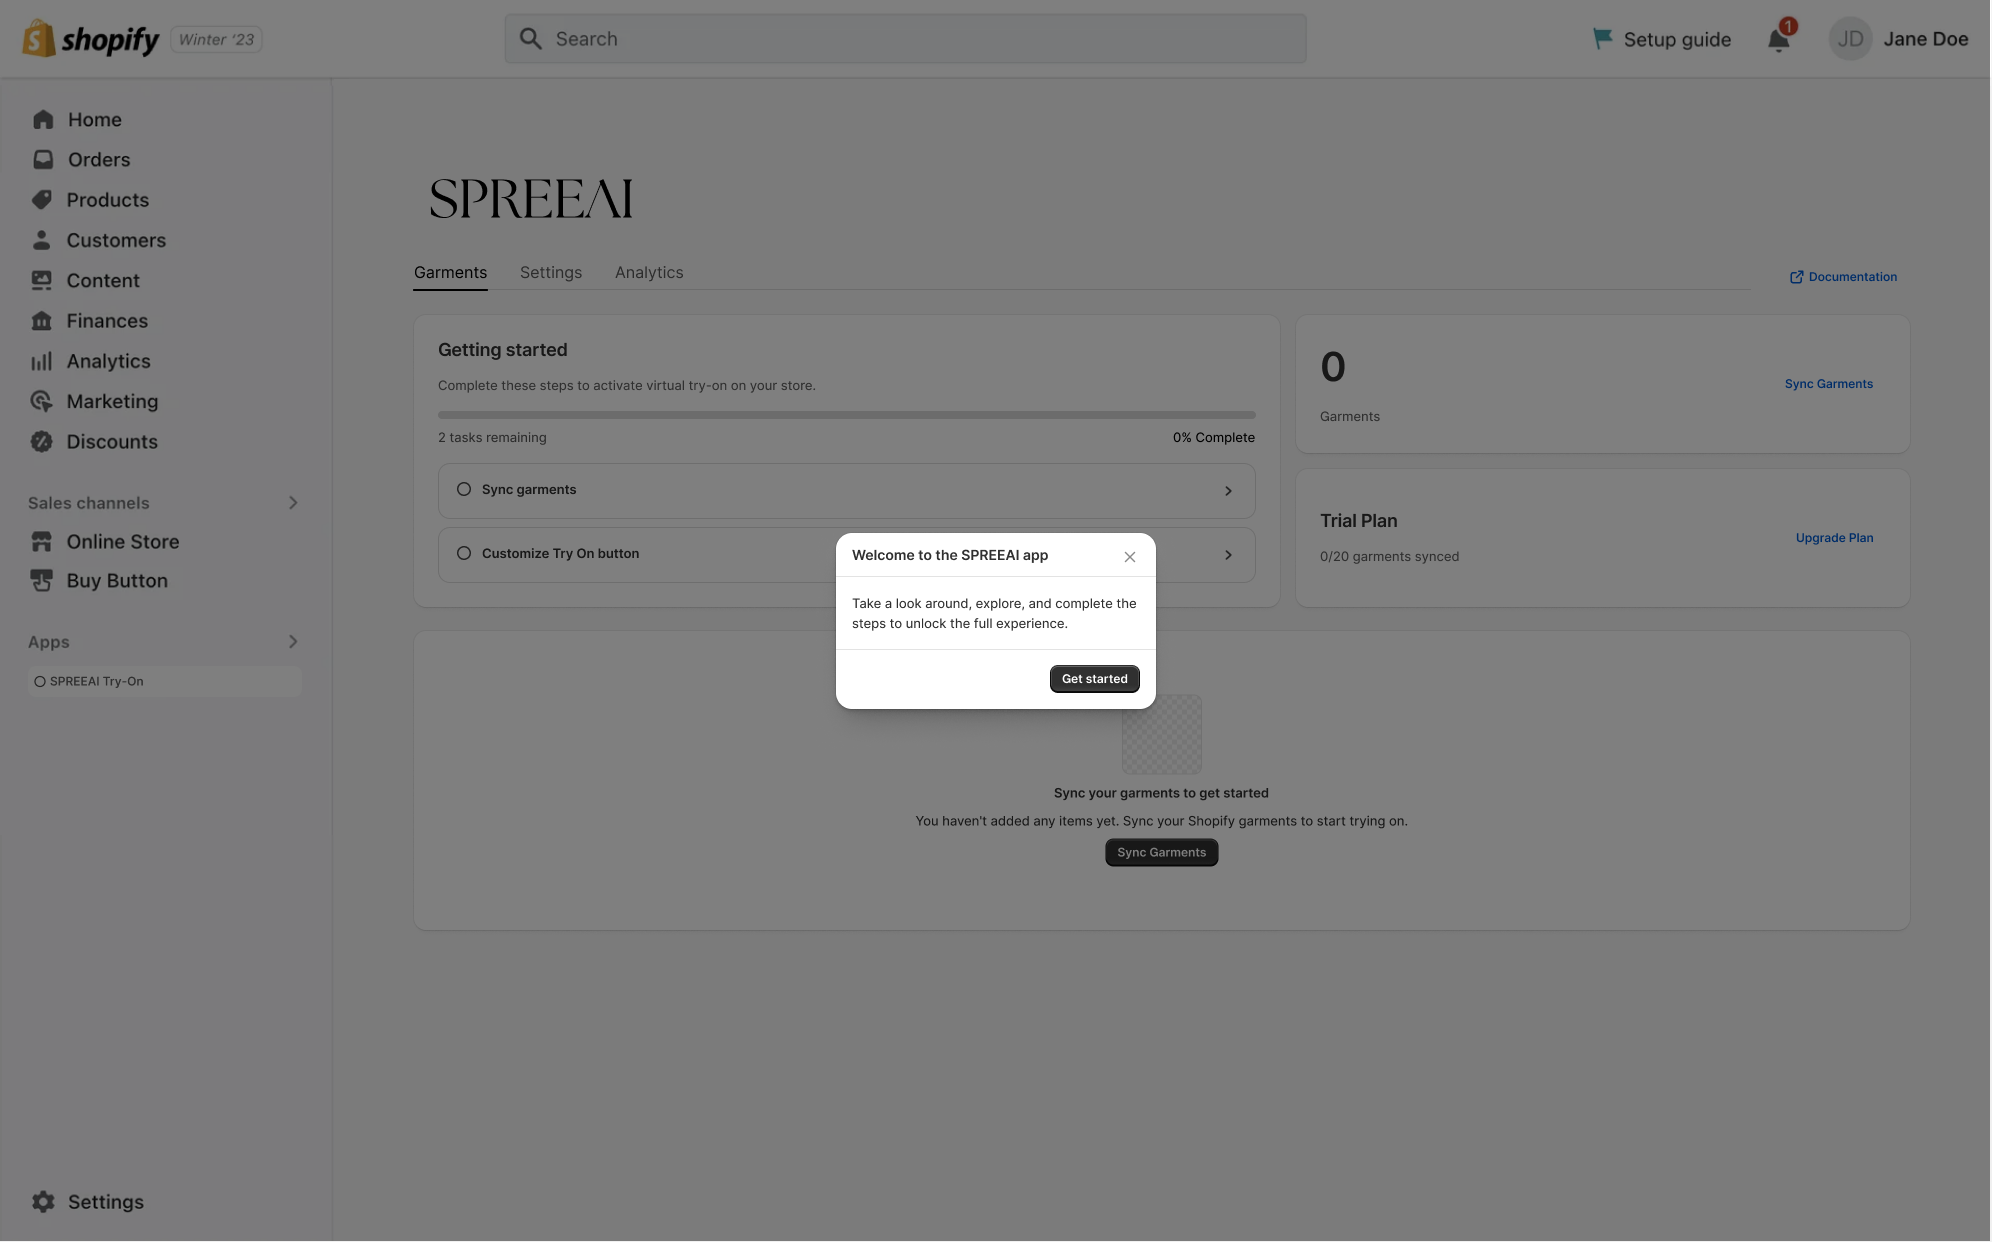
Step 2 — Choose Your Plan
After accepting the agreements, select a subscription plan to start your 14-day free trial — you won't be charged until the trial ends, and you can cancel anytime.
- Review the available plans and pick the one that fits your catalog
- Click to select a plan
- Confirm the subscription in Shopify on the next screen
Shopify opens its approval page as soon as you select a plan. Approve the subscription there. Shopify needs a payment method on file for your store, but you are not charged during the 14-day trial.
If you close the page or click Cancel, you return to the app with a Confirm your subscription banner. Your trial still starts, and you can sync products, but the Try-On button stays hidden on your storefront until you confirm. See the FAQ for the details.
Not sure which plan to pick? See Requirements & Pricing for a full breakdown of SKU and try-on allotments.
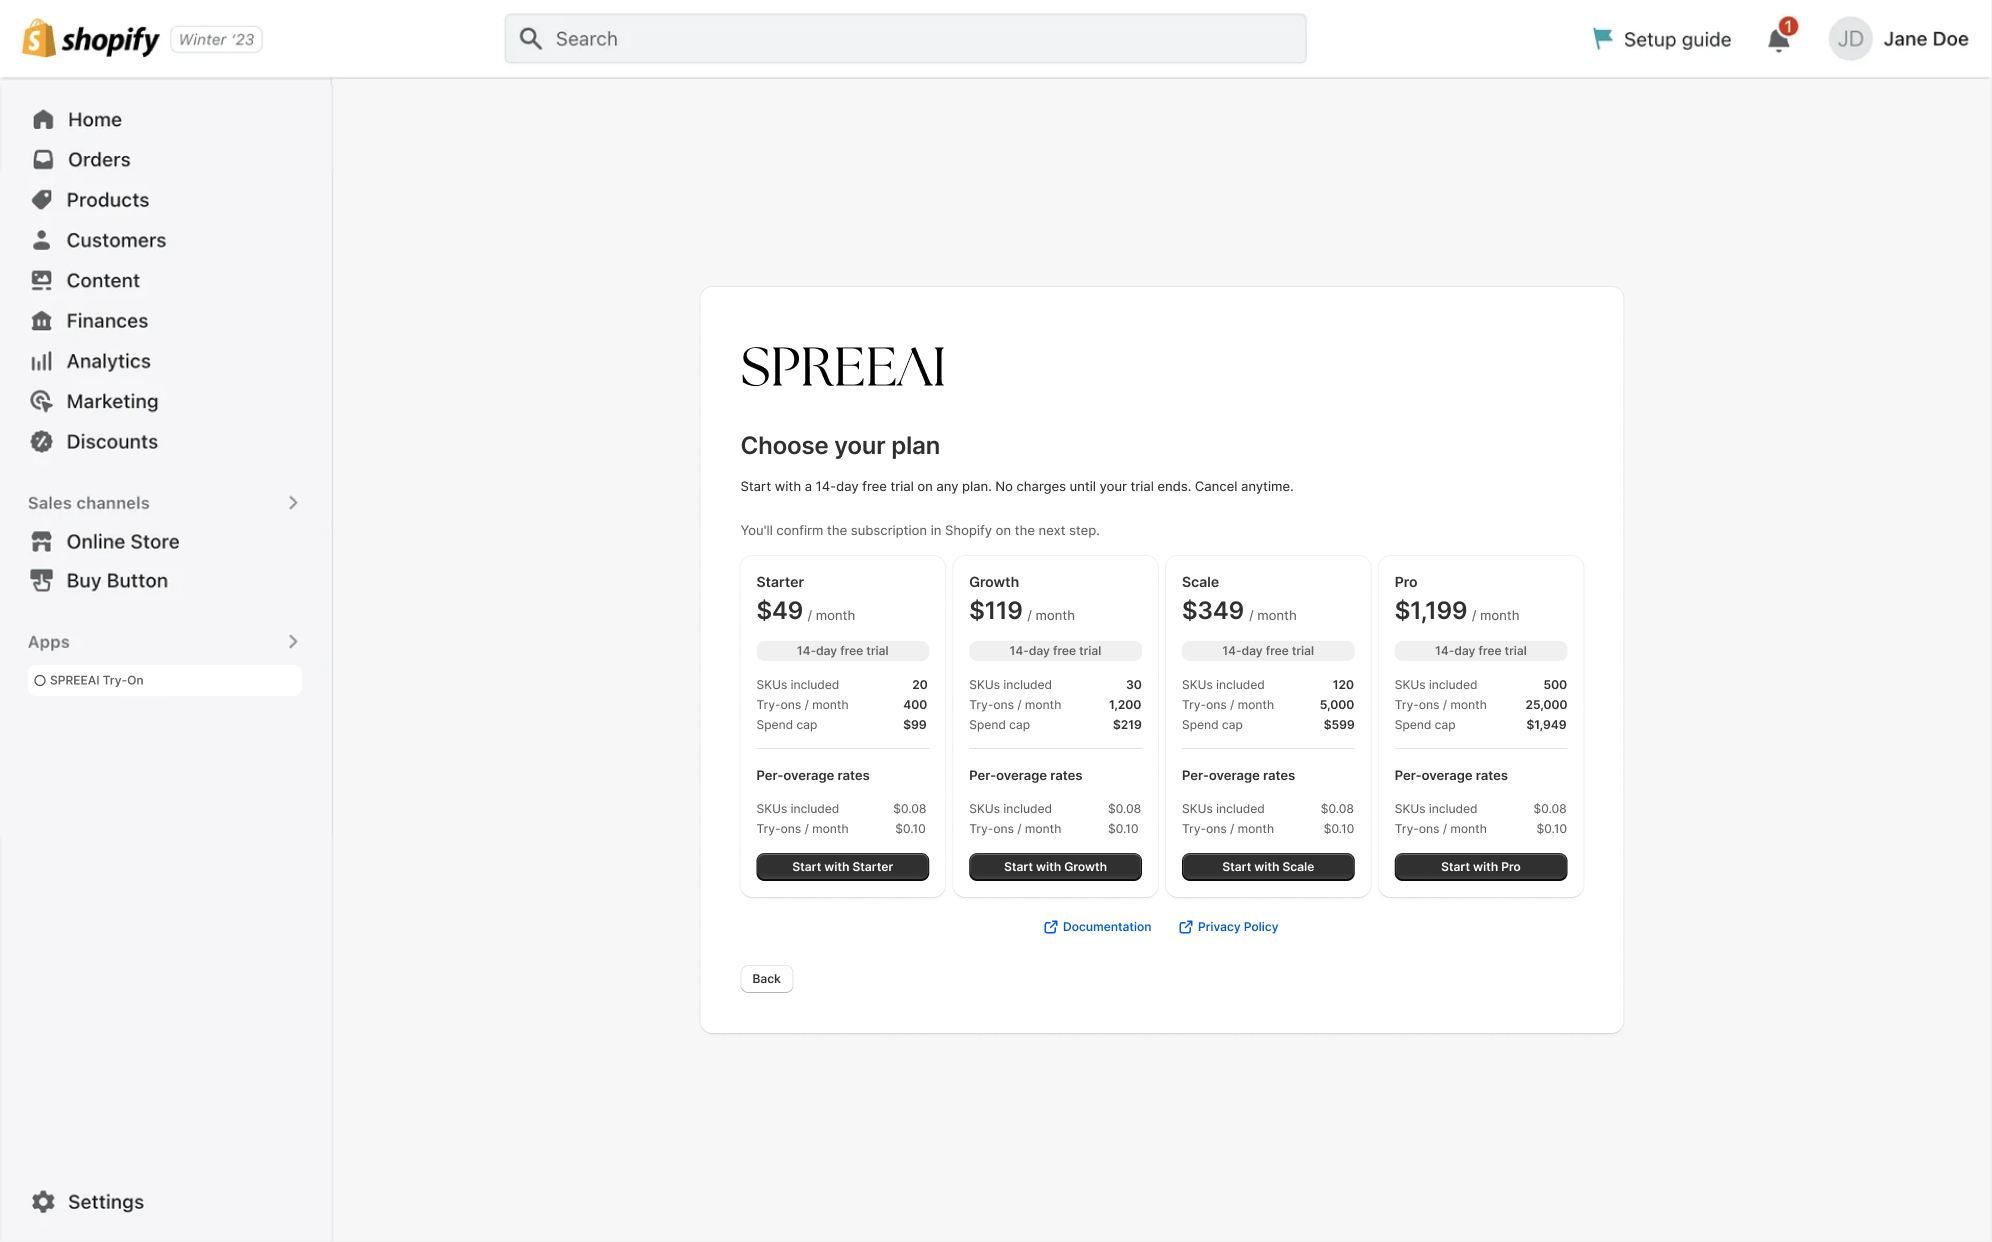
After you confirm your subscription, you'll land on the app dashboard. A short welcome tour and a Getting started checklist guide you through the remaining steps:
- Sync Products — Opens the sync dialog. The task completes on its own once your first product has synced.
- Customize storefront — Opens Shopify's theme editor in a new tab. The task is marked complete when you click it, so check yourself that the block was added and saved.
A completed checklist does not mean you are ready to launch: you still choose which products to enable and test them, as described in Step 6. When you come back later, the checklist is replaced by a card with up to three reminders: a scheduled plan change, your next billing date, and a warning when you approach your monthly try-on quota.