Step 6 — Preview & Go Live
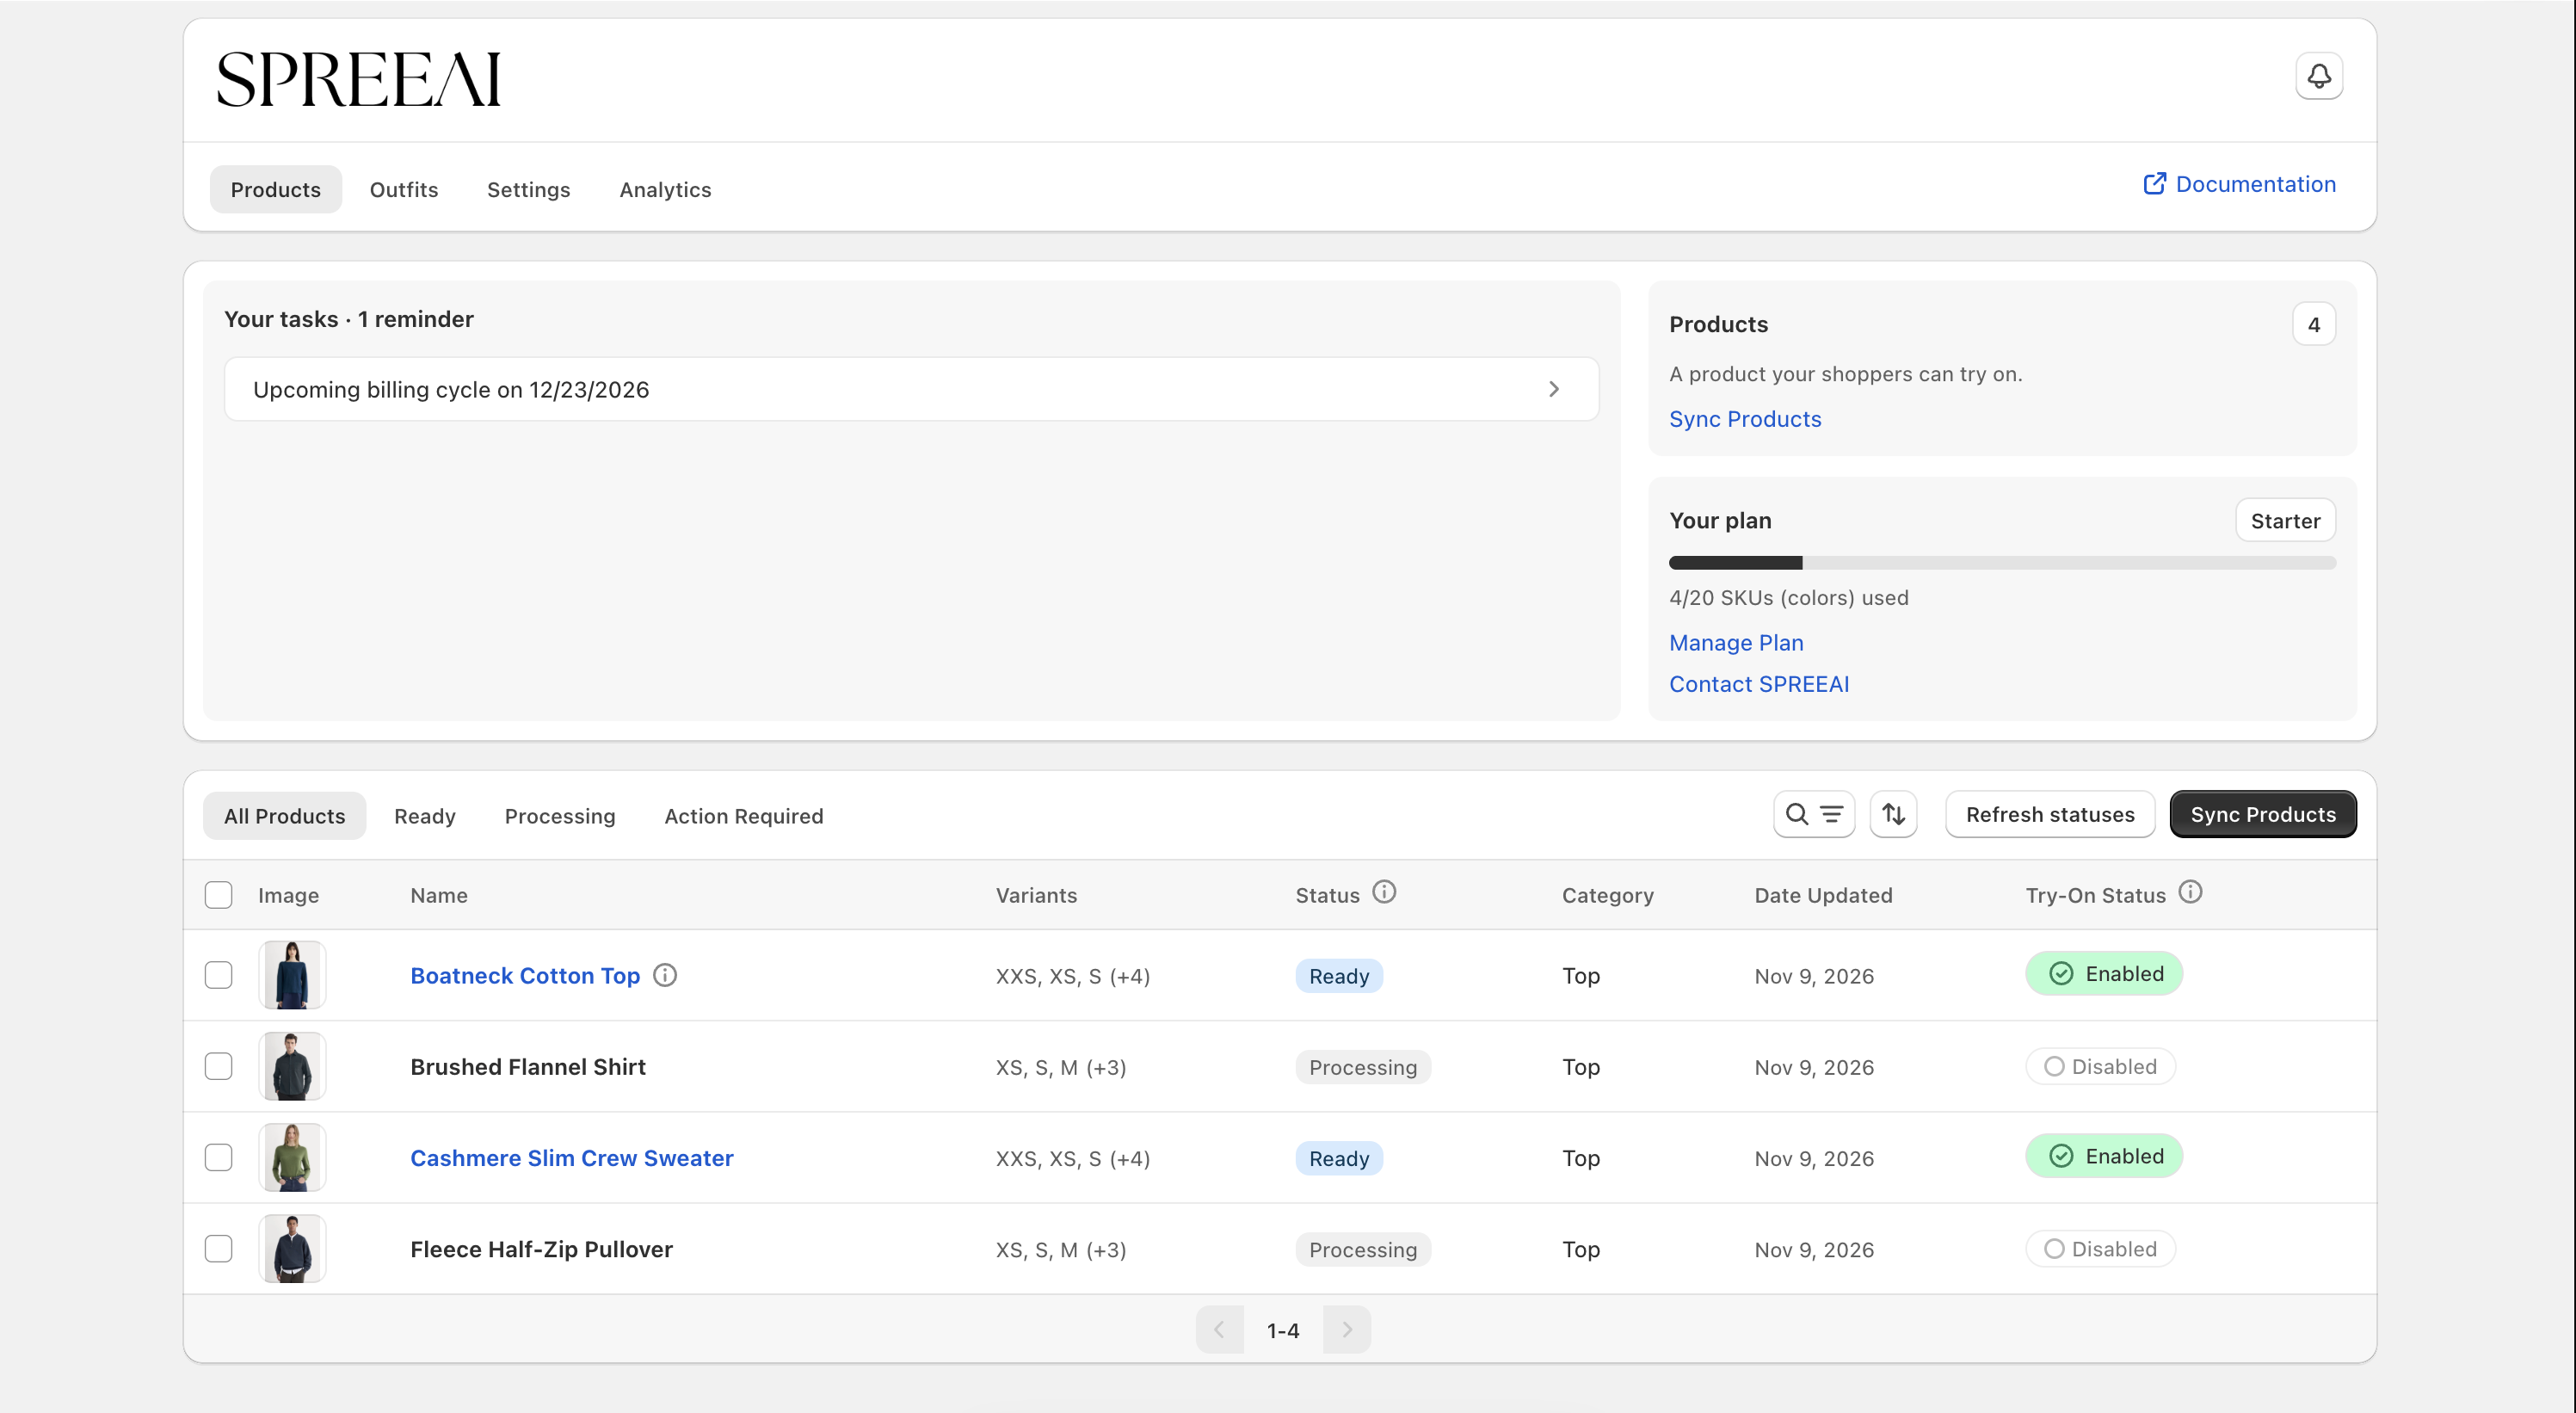
A Ready product is prepared, but shoppers can't see its try-on until you enable it. New products always start disabled: syncing, processing, and starting your trial never enable a product on their own.
To enable a product:
- On the Products tab, find the Ready product and check that it is the product and color you intend
- Switch its Try On Status to Enabled, or select it and click Enable Try-On
- Confirm. The product's status changes to Live
Switch it back to Disabled, or click Disable Try-On, to hide its try-on again at any time. Its sync data and your theme settings are kept.
Before You Launch
Each of these is a separate condition, and all of them must be true for a shopper to see try-on on a product:
- You approved the SPREEAI subscription in Shopify
- The product is Ready and its Try On Status is Enabled
- A SPREEAI block is added and saved on the product's template in your published theme
- Virtual Try-On is on in Settings → Feature Settings (see Feature Settings)
- The product page itself is visible to shoppers in Shopify
Test on Your Storefront
The app has no separate test mode or preview link, so test on the product page of your published storefront. The theme editor preview shows how the button looks, but not whether a full try-on works. Try-ons you run while testing count toward your plan's allowance.
- Open the enabled product's page on your storefront
- Open the try-on and follow the on-screen photo instructions, or choose one of SPREEAI's models (a Twin) if offered
- Check that the result shows the right product and color, and preserves its shape, print, seams, and other details
- Close and reopen the try-on, and repeat on a phone and a computer
- Open a product you left disabled and check that it shows no SPREEAI button
See Testing Your Storefront for checks of the other features, such as Compare and Find your size.